Creating Activity Diagrams with Umbrello 5
Table of Contents
- Introduction to Activity Diagrams
- Getting Started
- Creating Initial Activity
- Adding Activities and Transitions
- Adding Decision Nodes
- Working with Fork/Join Nodes
- Finalizing the Diagram
- Saving and Exporting
1. Introduction to Activity Diagrams
Activity diagrams in UML are used to model the flow of actions in a system. They are particularly useful for visualizing business processes, workflows, and complex algorithms.
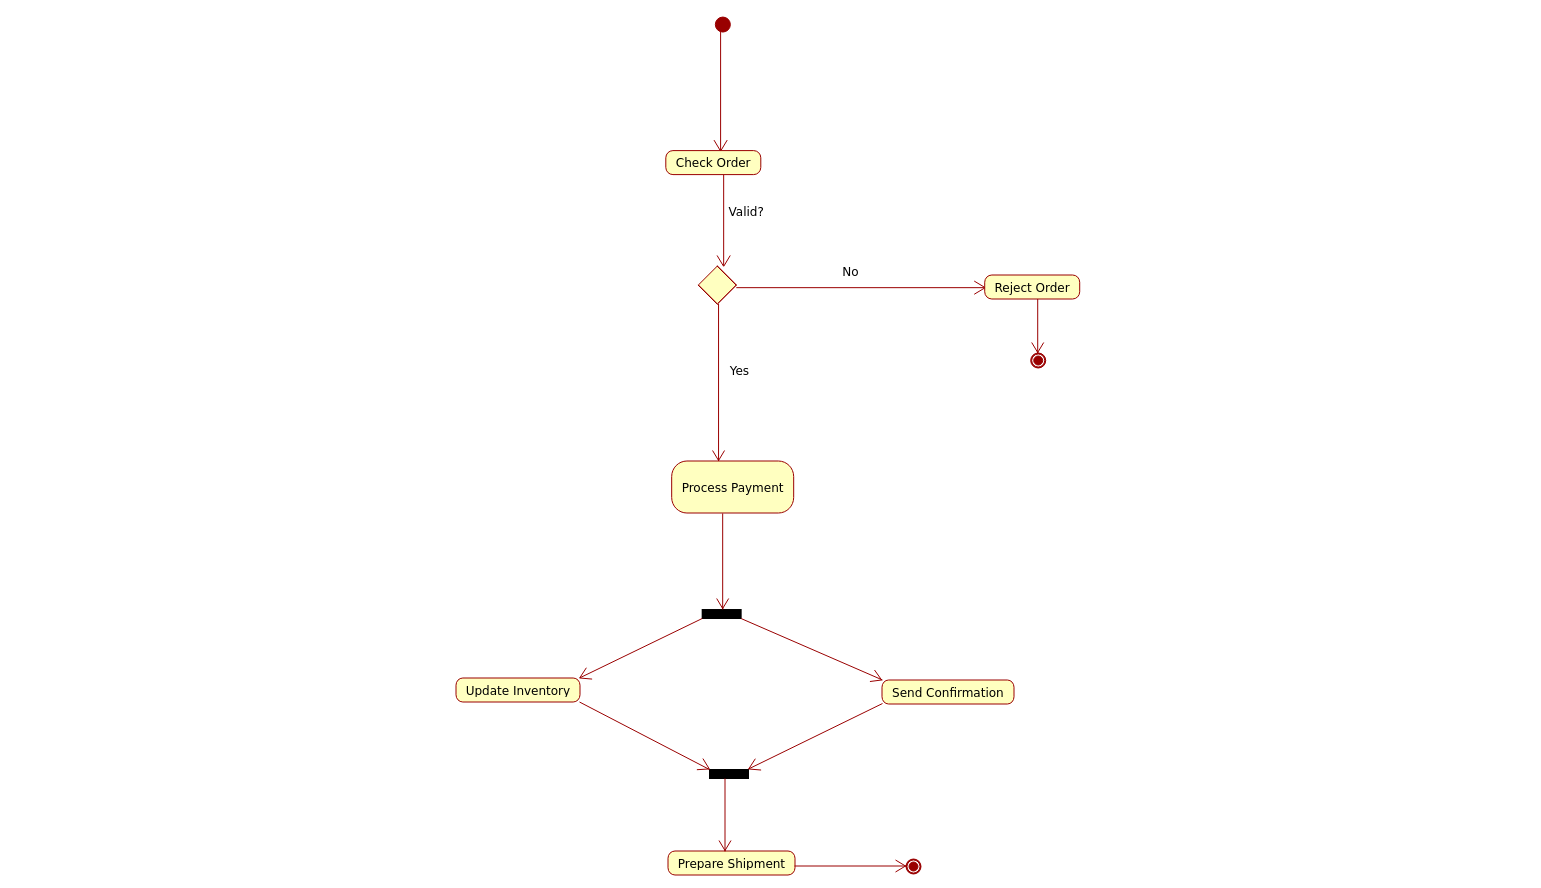 Diagram To Create
2. Getting Started
Creating a New Activity Diagram
- Launch Umbrello 5
- Go to Diagram → New → Activity Diagram
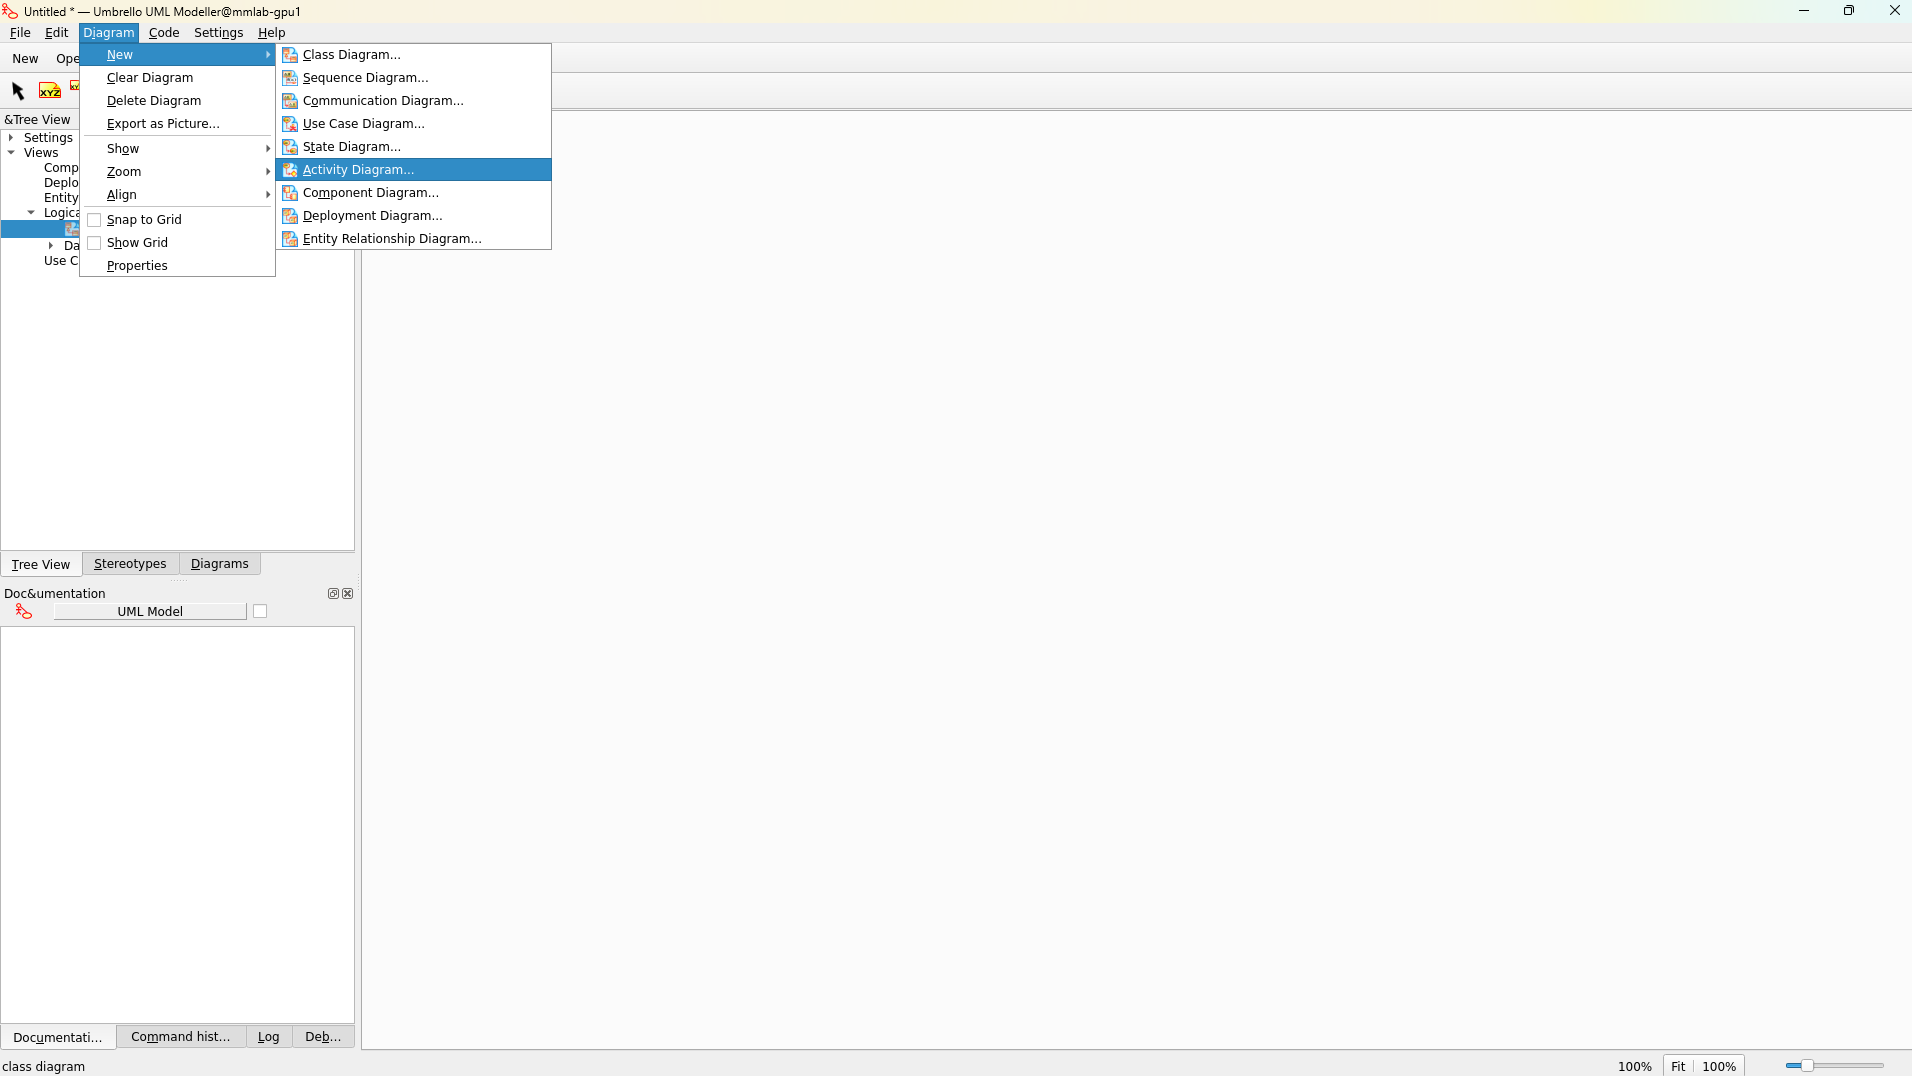 Creating a new activity diagram
3. Creating Initial Activity
Adding Initial Node
- Click on the Initial Activity icon from the toolbar (solid black circle)
- Click on the diagram where you want to place it
 Adding an initial node to the diagram
Adding First Activity
- Click on the select tool
- Right click on the Initial Node previously create, click on new --> activity
- Enter a name for the activity (e.g., "Check Order"), to do this double click on the activity
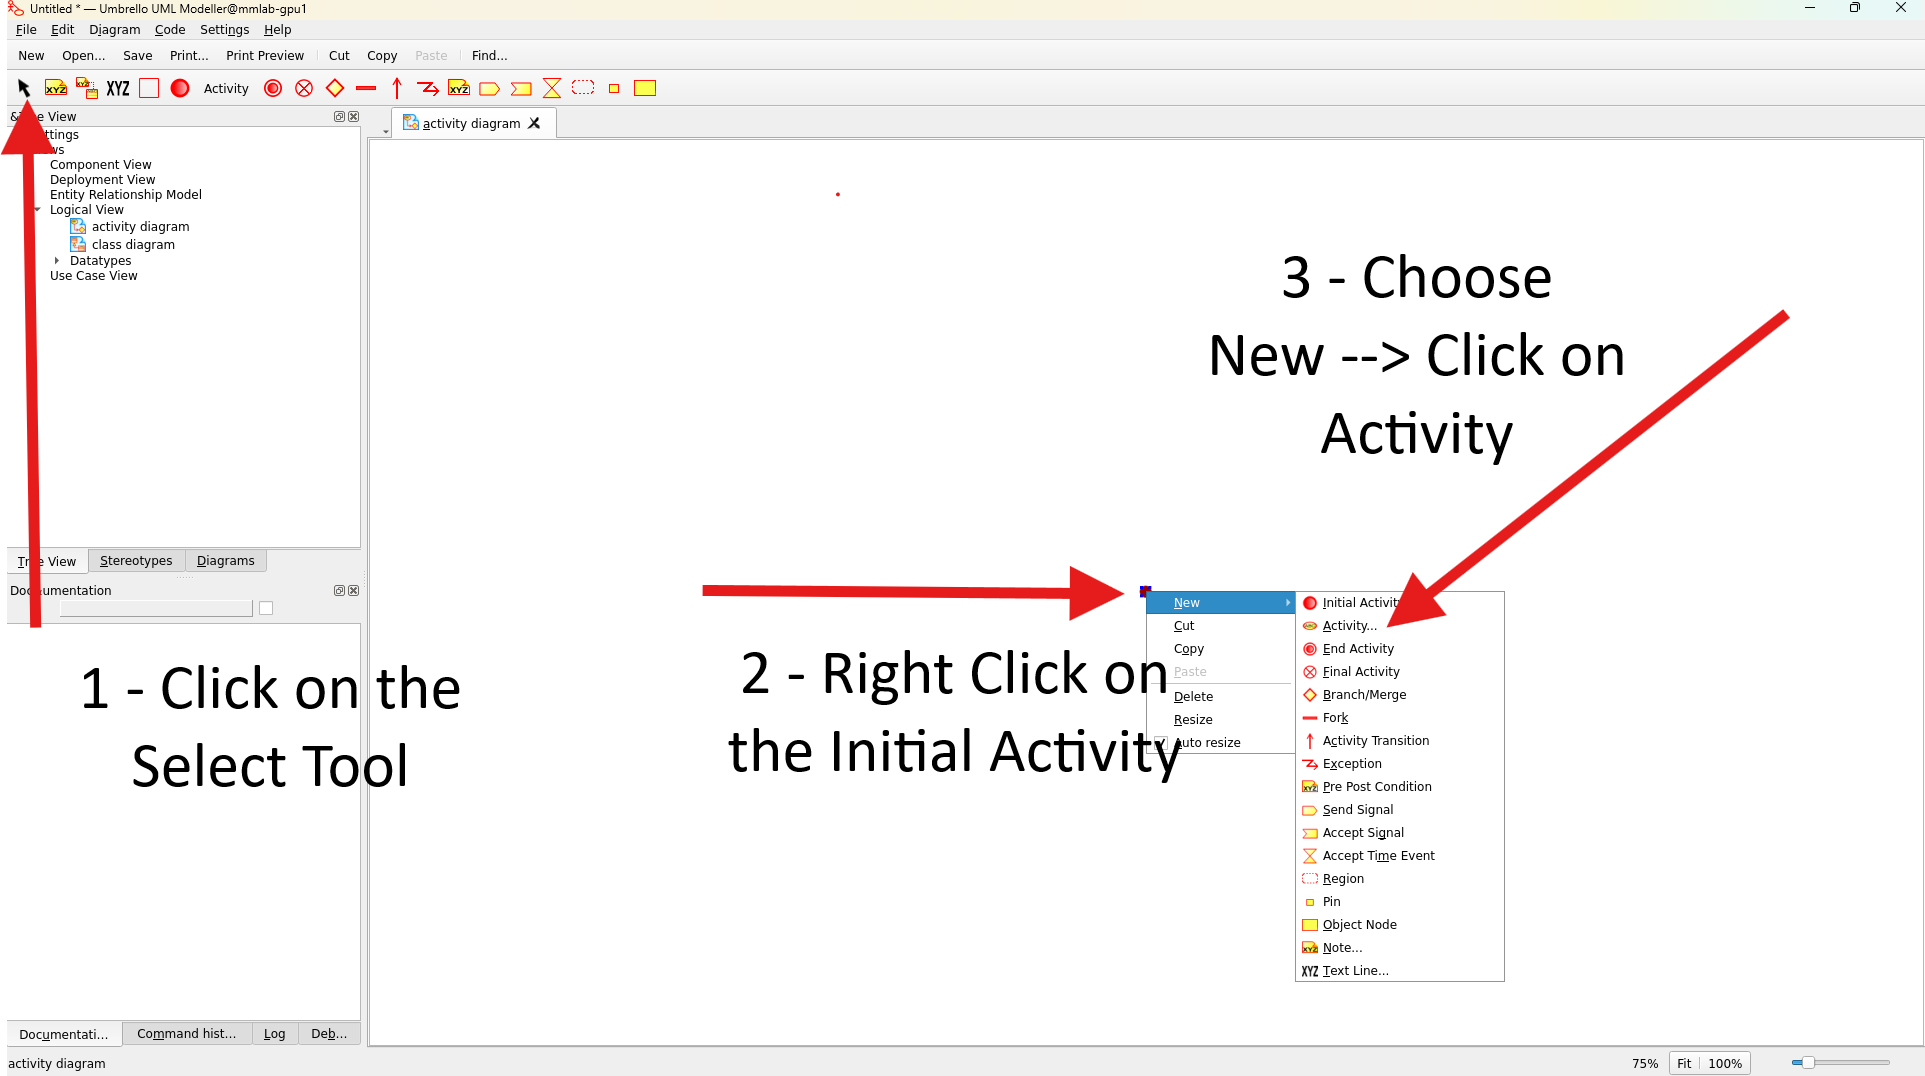
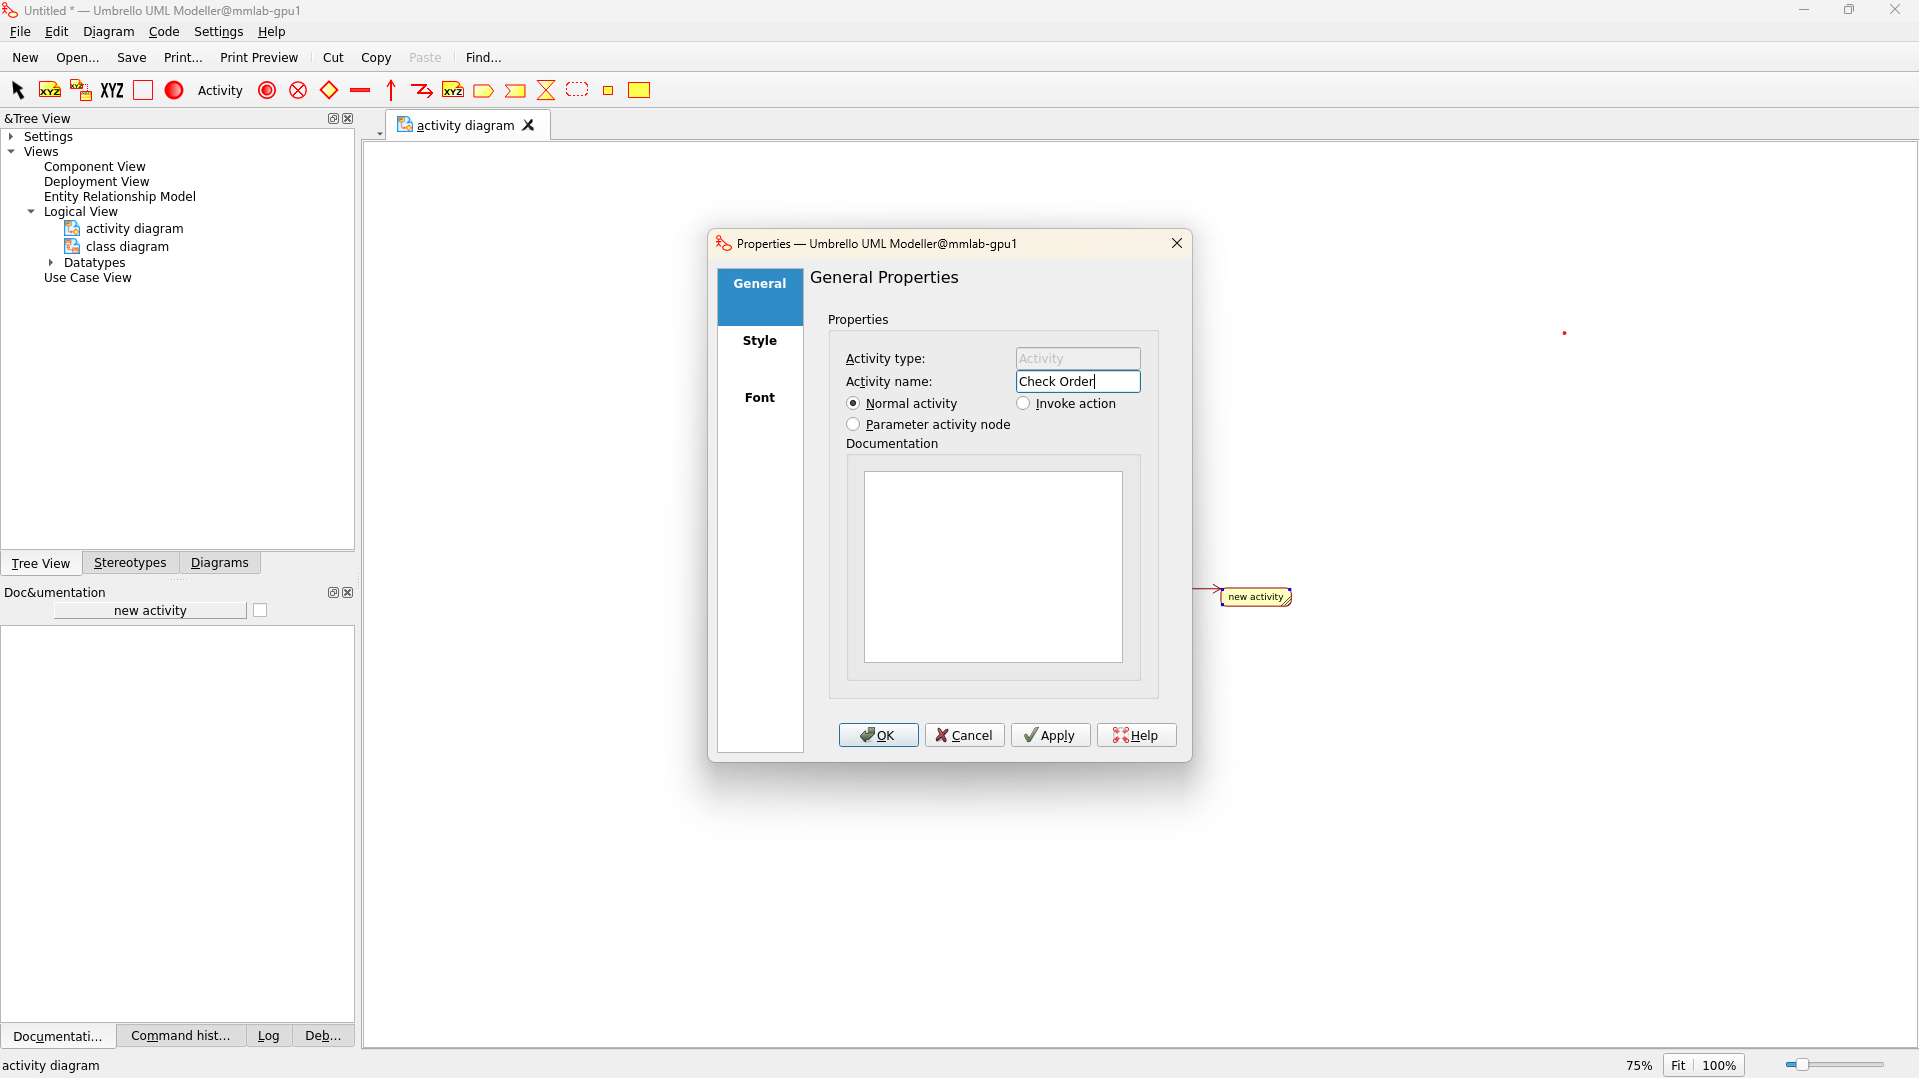 Adding and naming an activity
4. Adding Activities and Transitions
Creating Decision Node
- Click on Select tool, right Click on the new Activity previously created
- Select New --> Branch
- In toolbar select the Text Option, give it a name and the add it along with Activity Transition
- Add text to the branch (e.g., "Valid?")
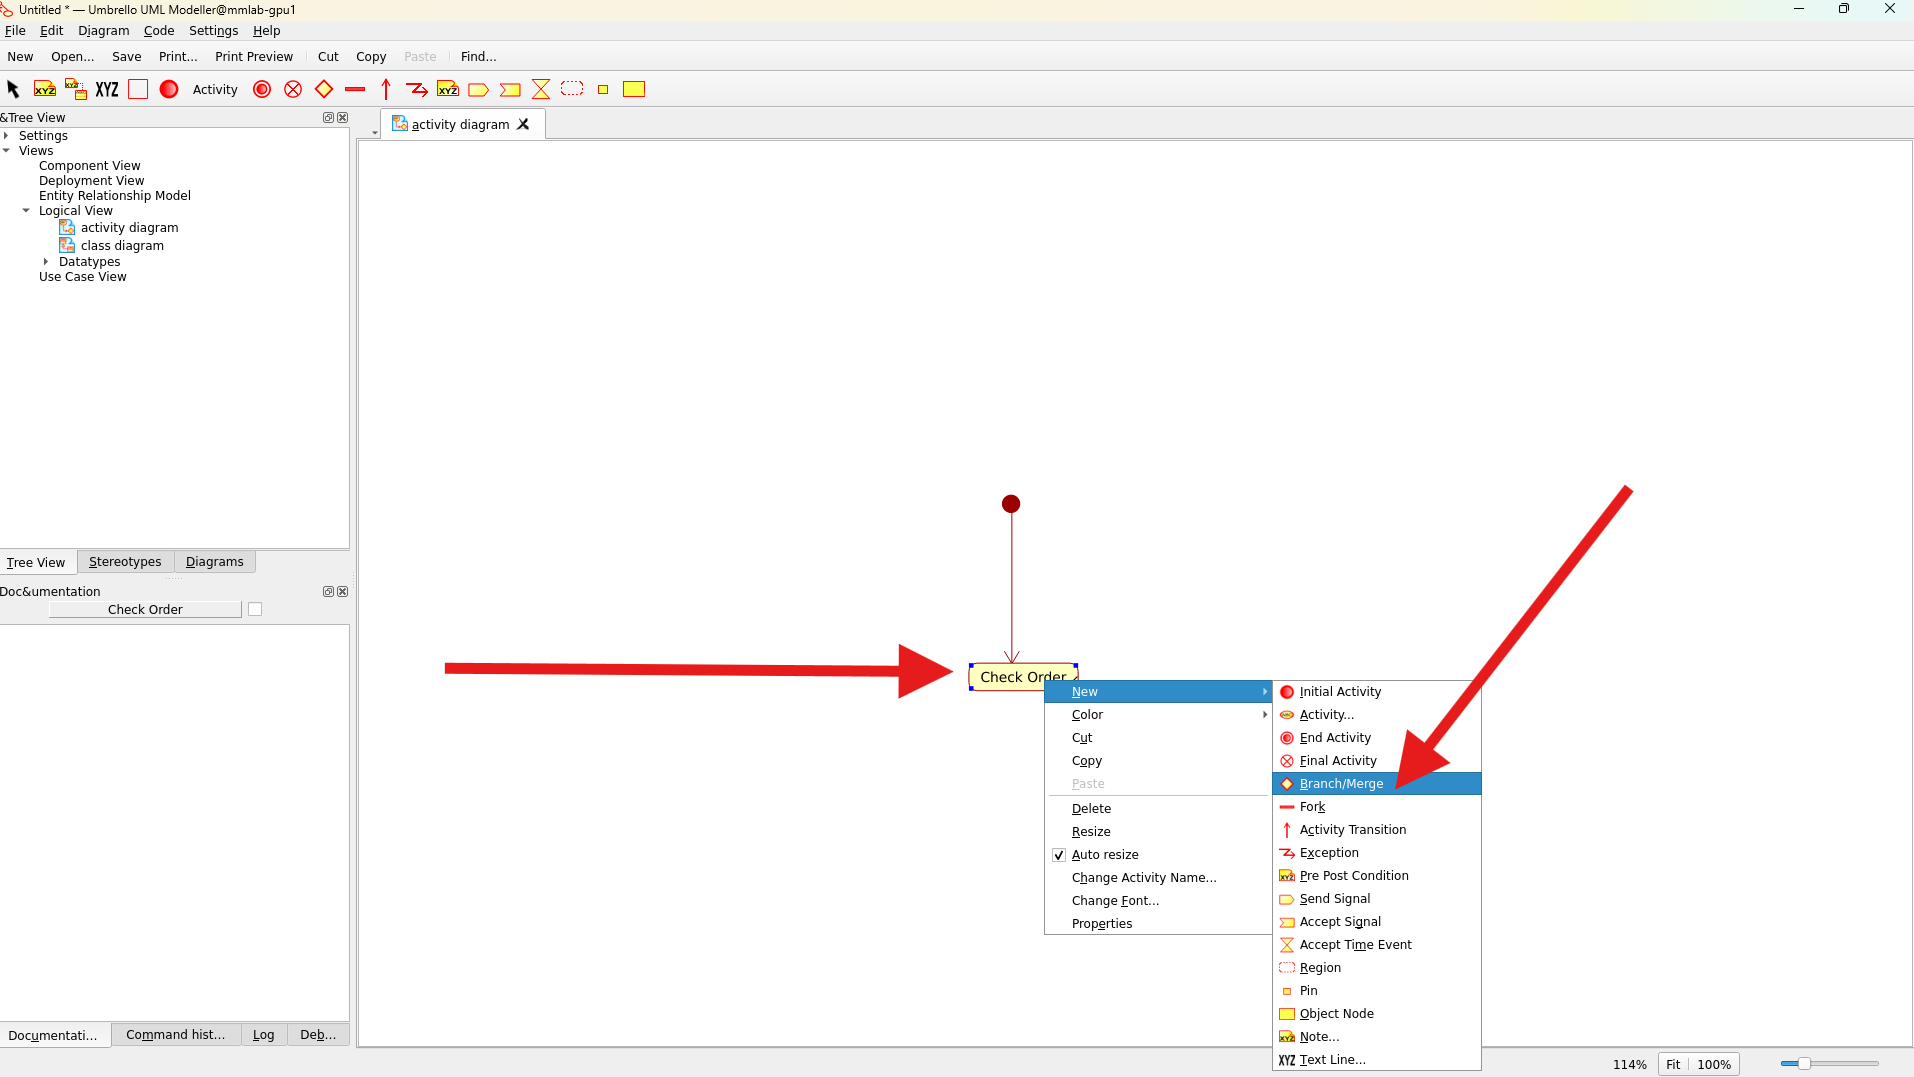
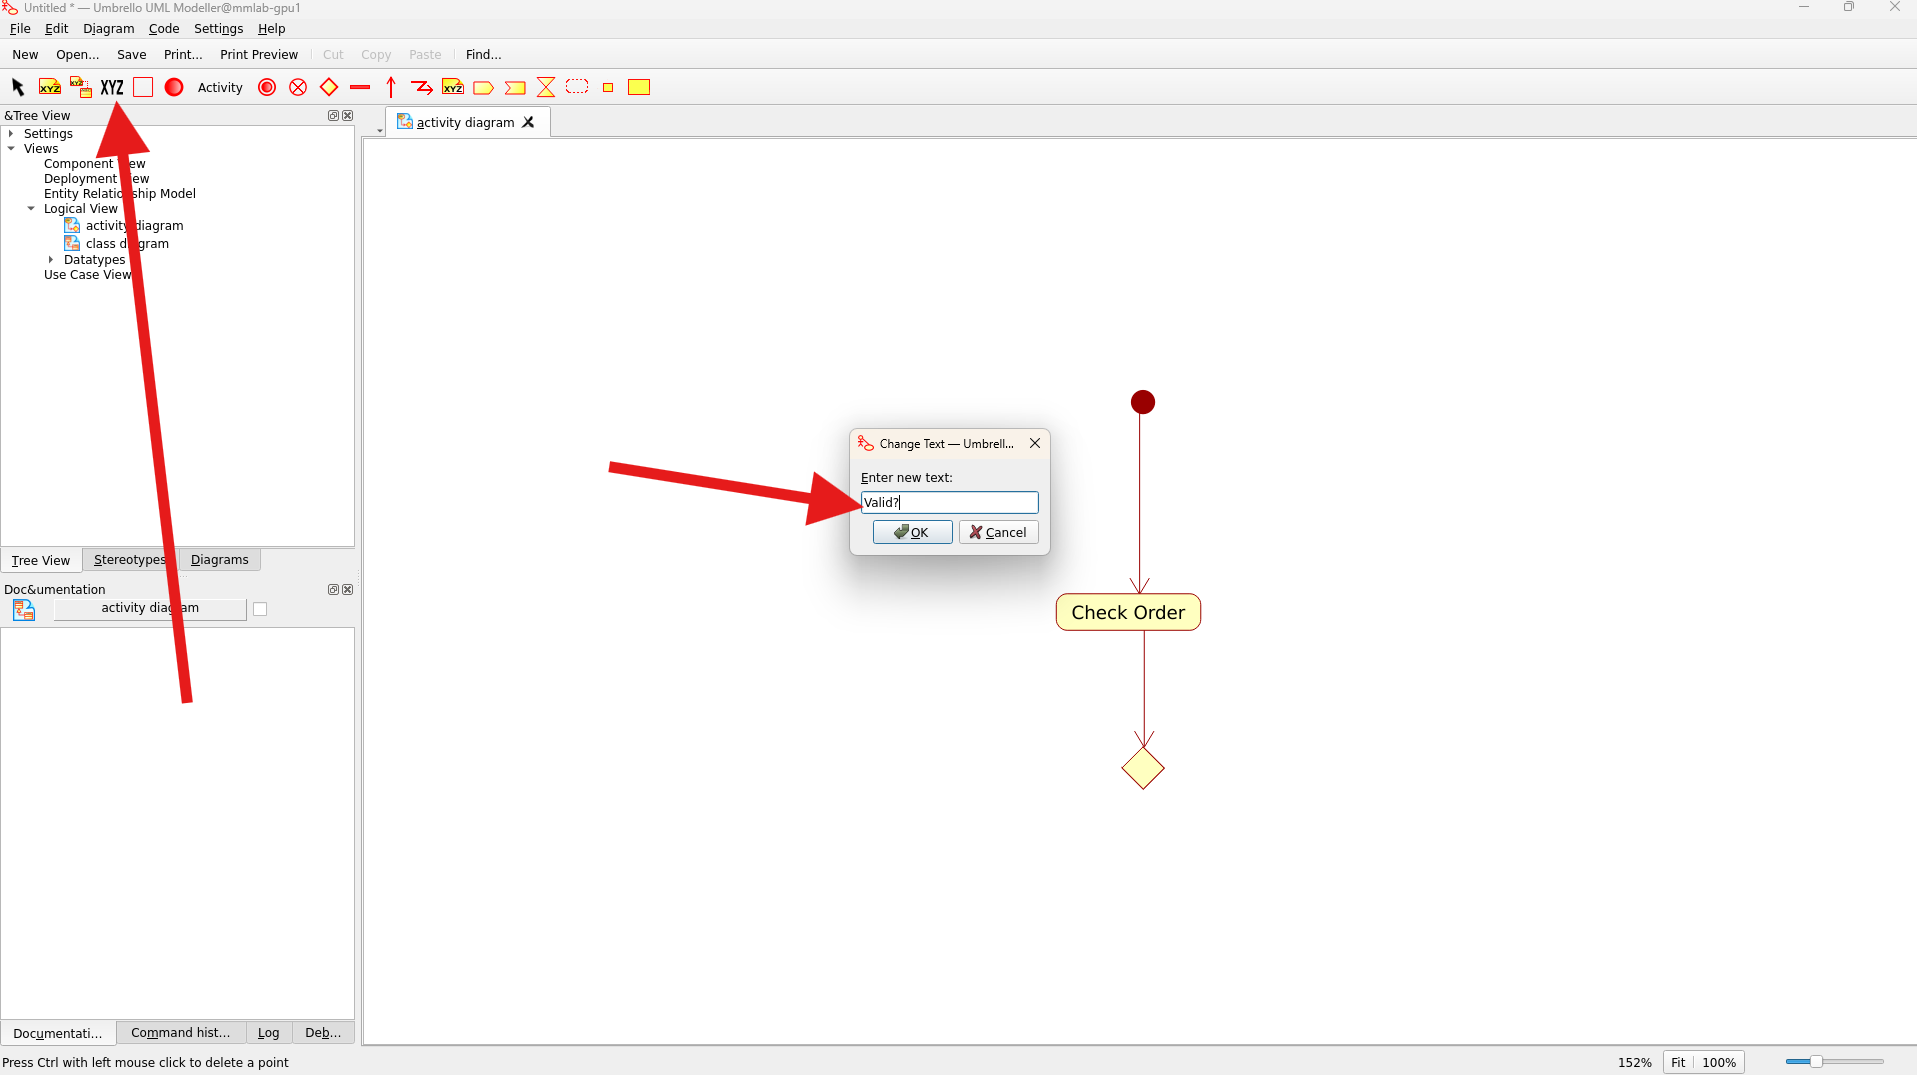 Creating a decision node with condition
Adding More Activities
- Click on the Select Tool, Right click on the Branch previously created
- Select New --> Activity
- Add additional activities for different paths (e.g., "Process Payment", "Reject Order")
- Add the names for the Transitions by using the Text Tool
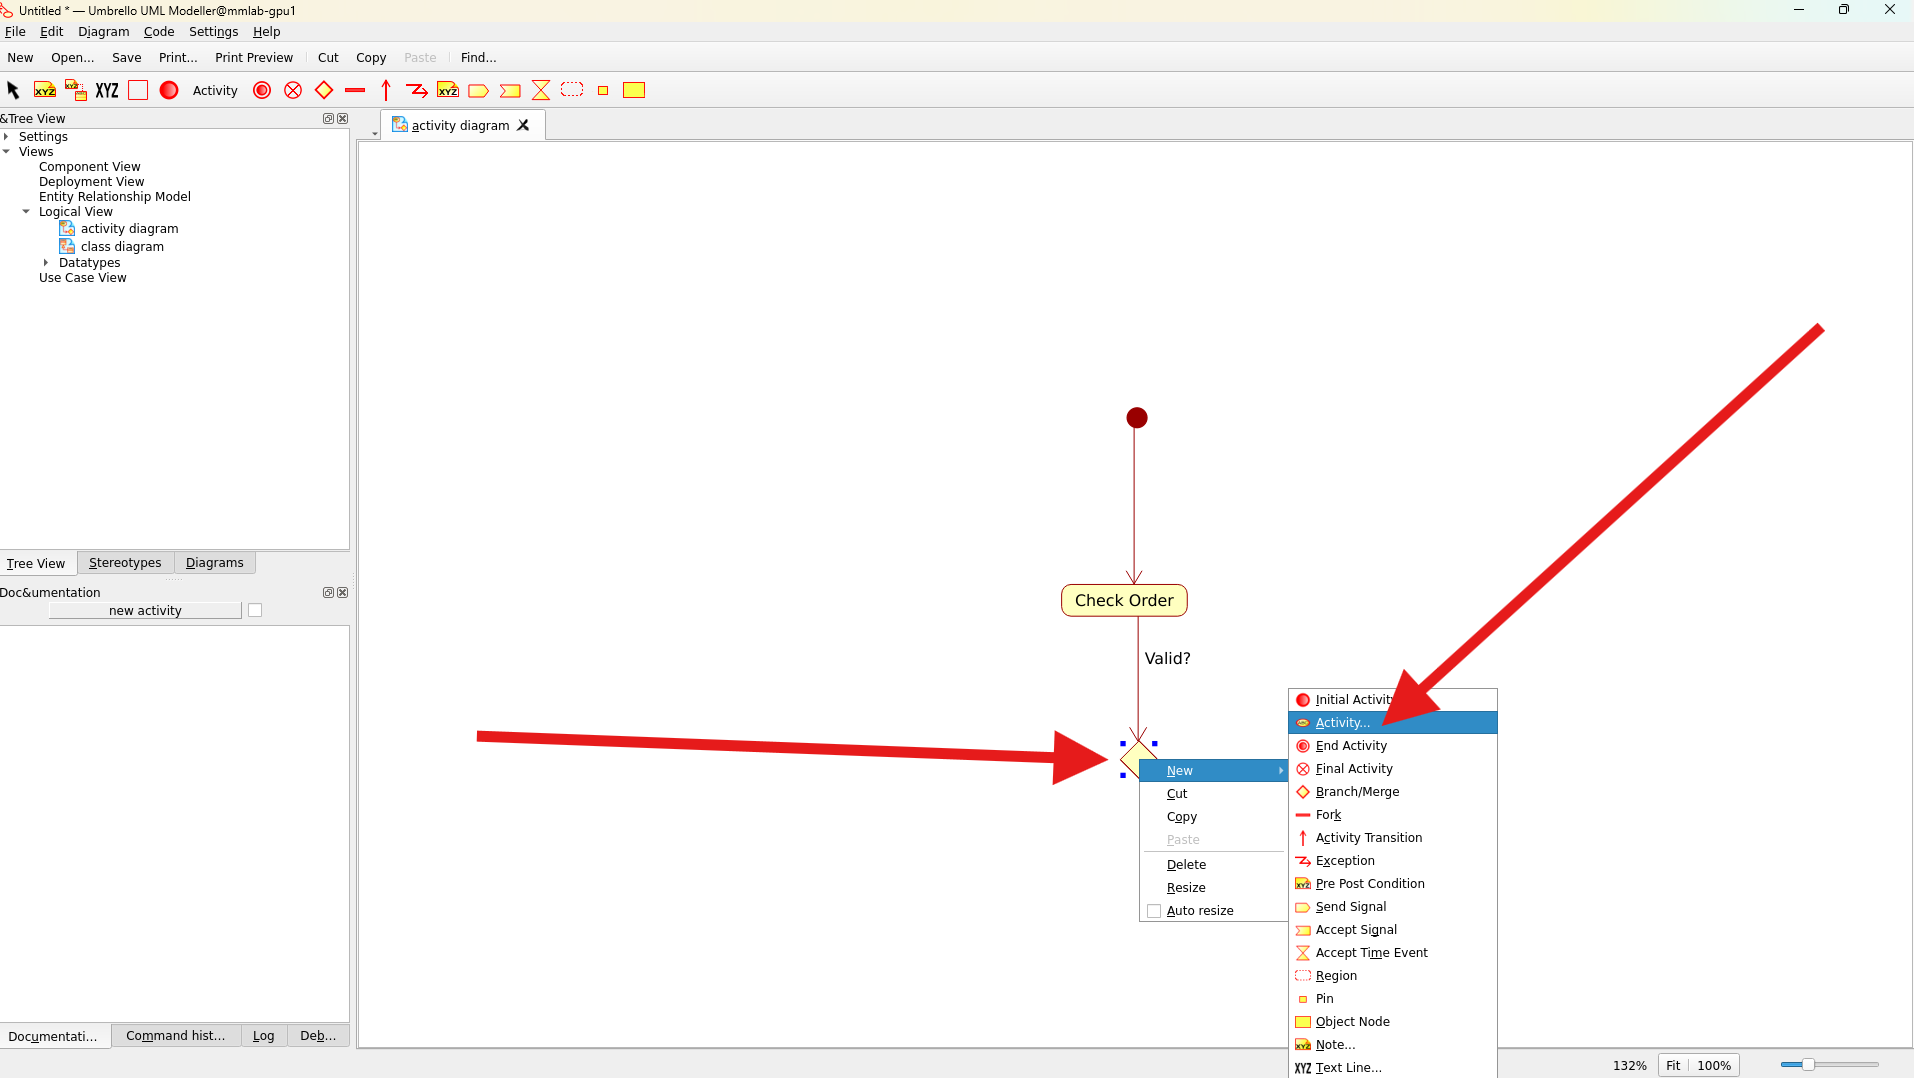
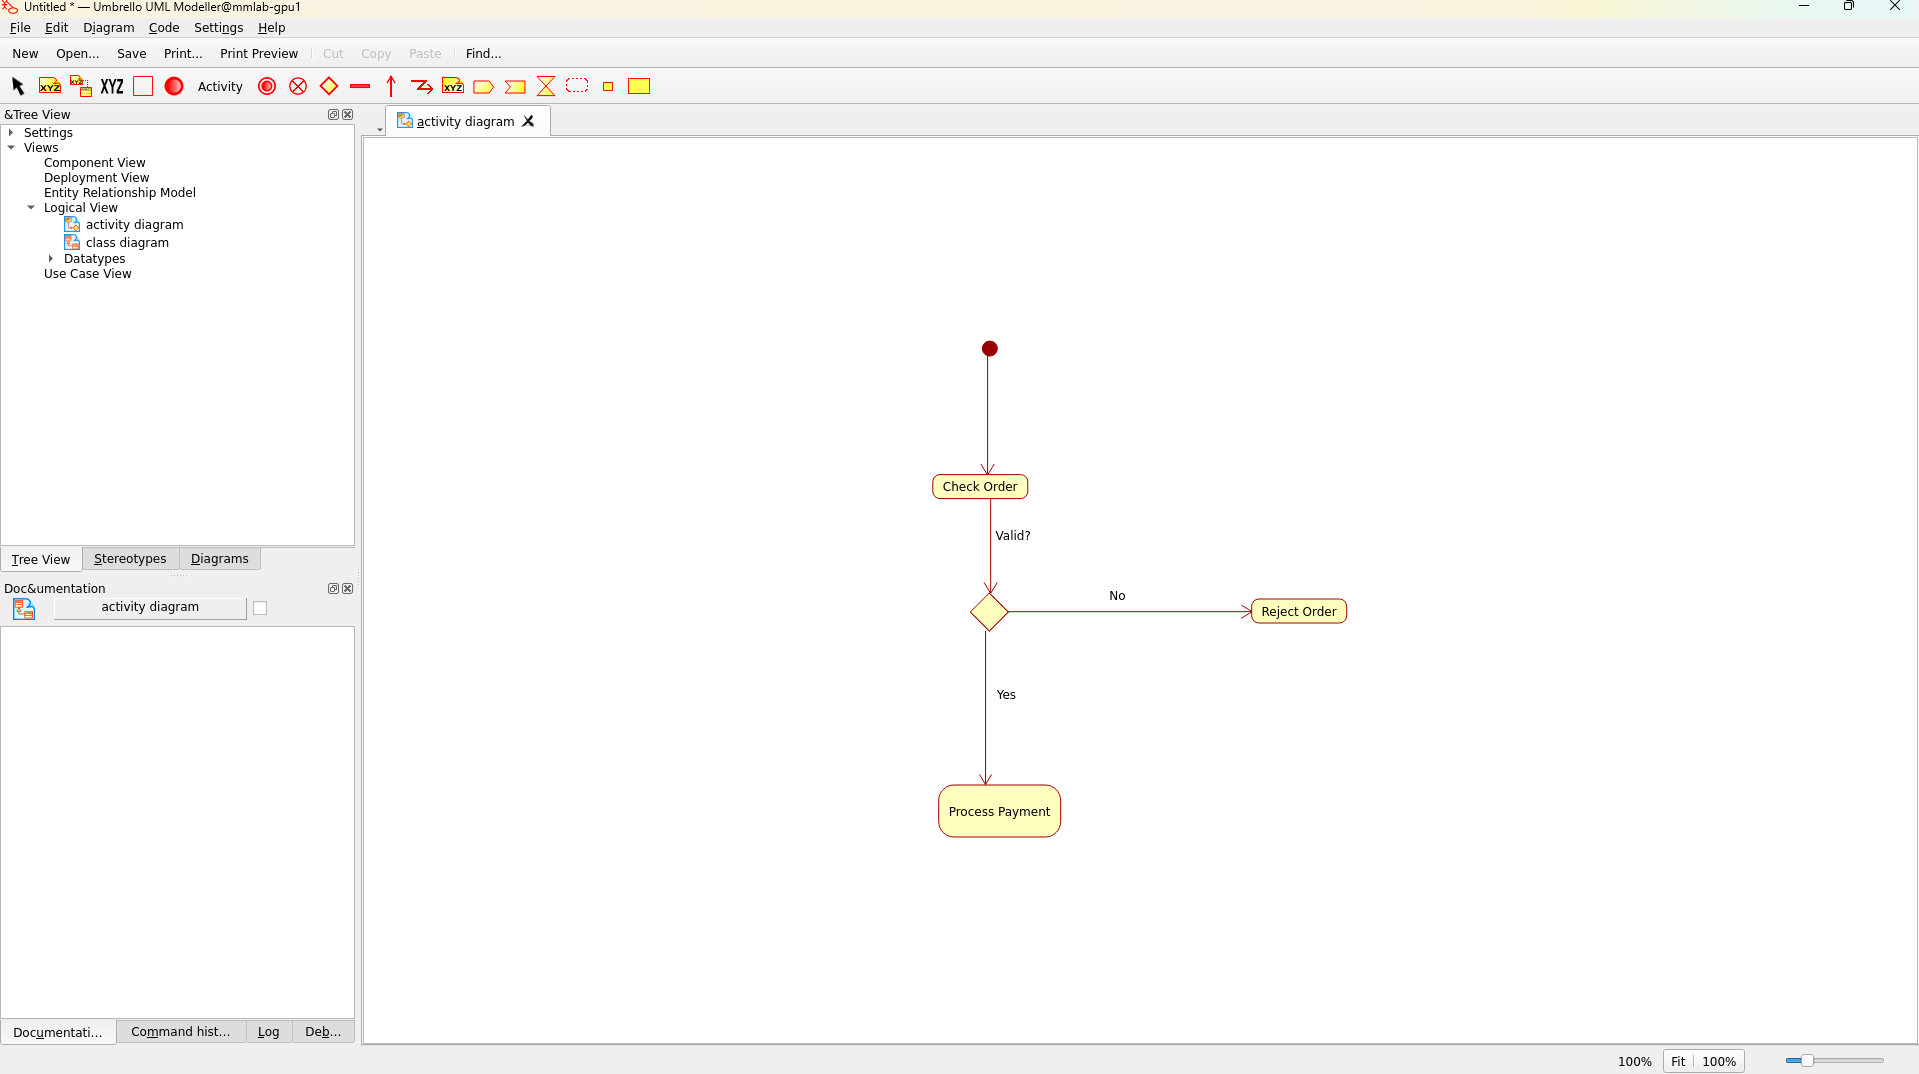 Adding activities and connecting them
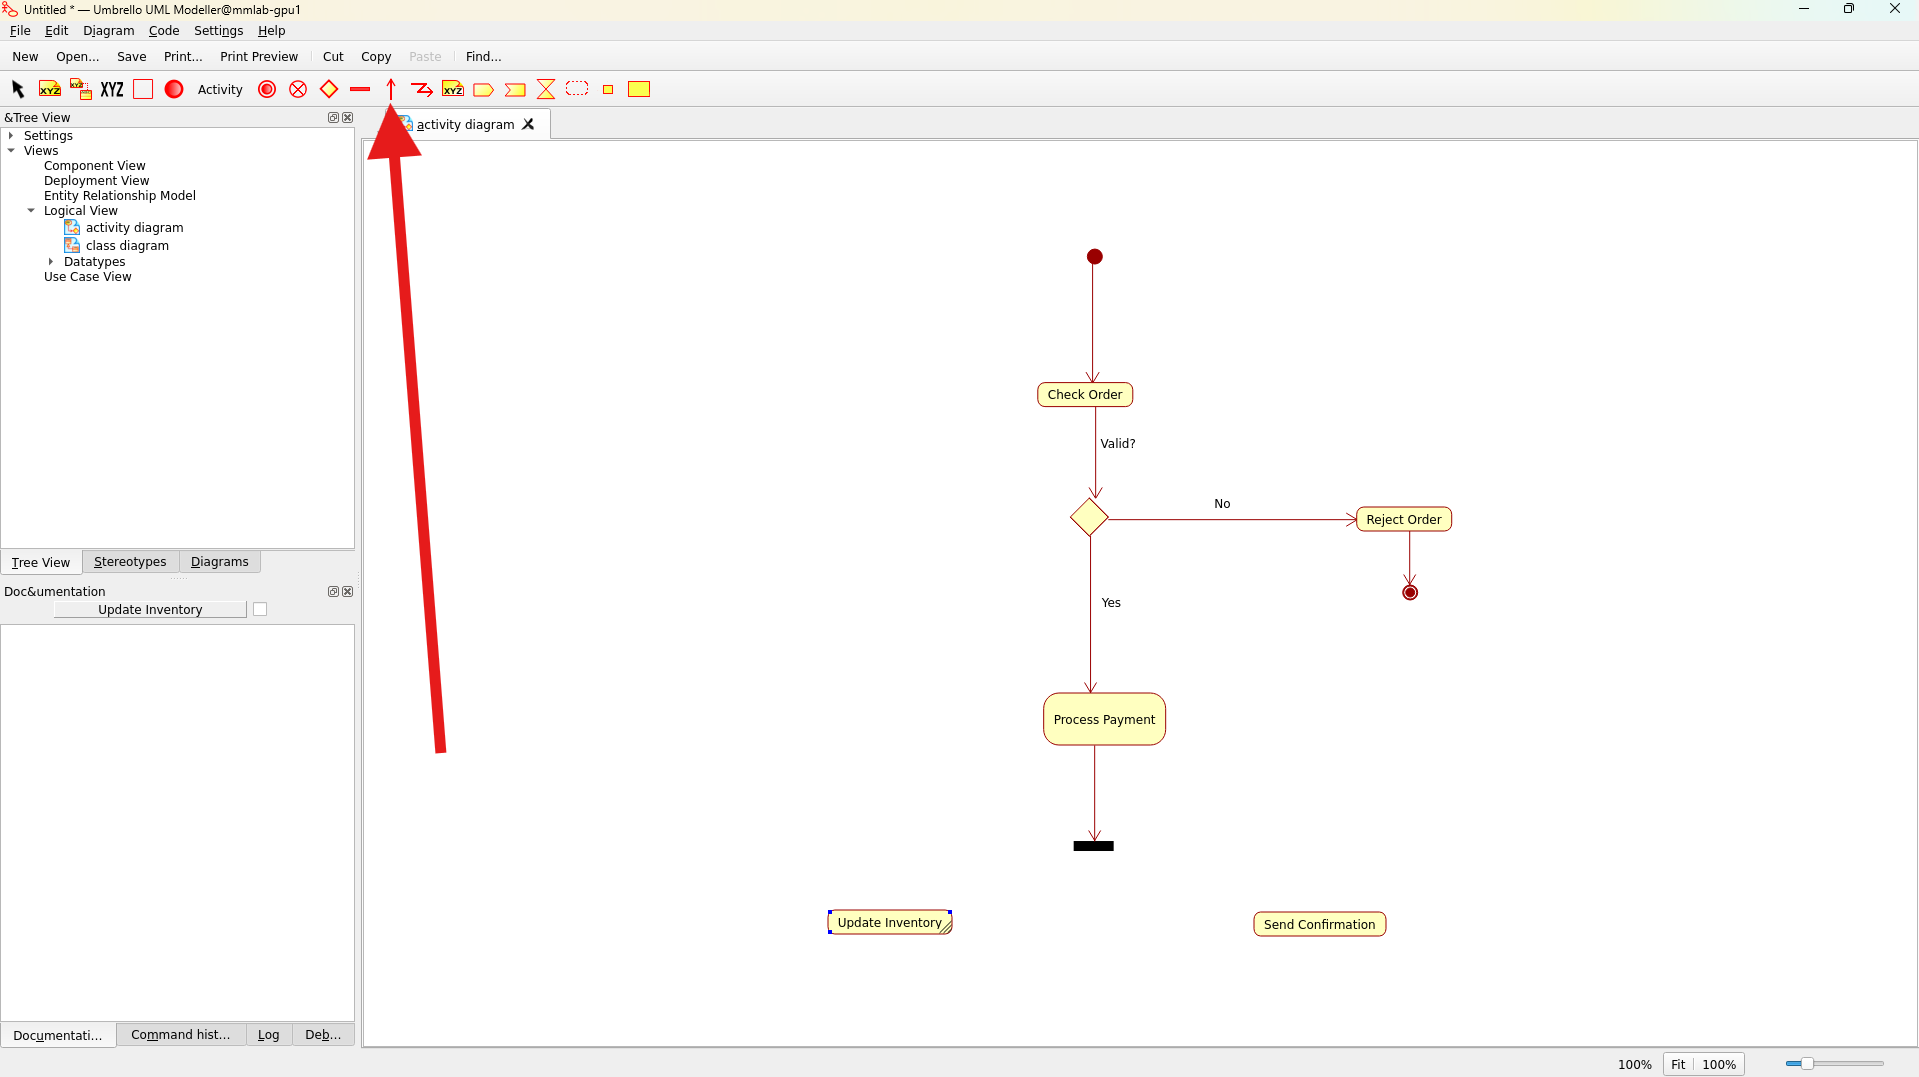
Adding End Activities
Add end activity nodes to terminate the flows:
- Click on Select tool, right Click on the new Activity("Reject Order")previously created
- Select New --> End Activity
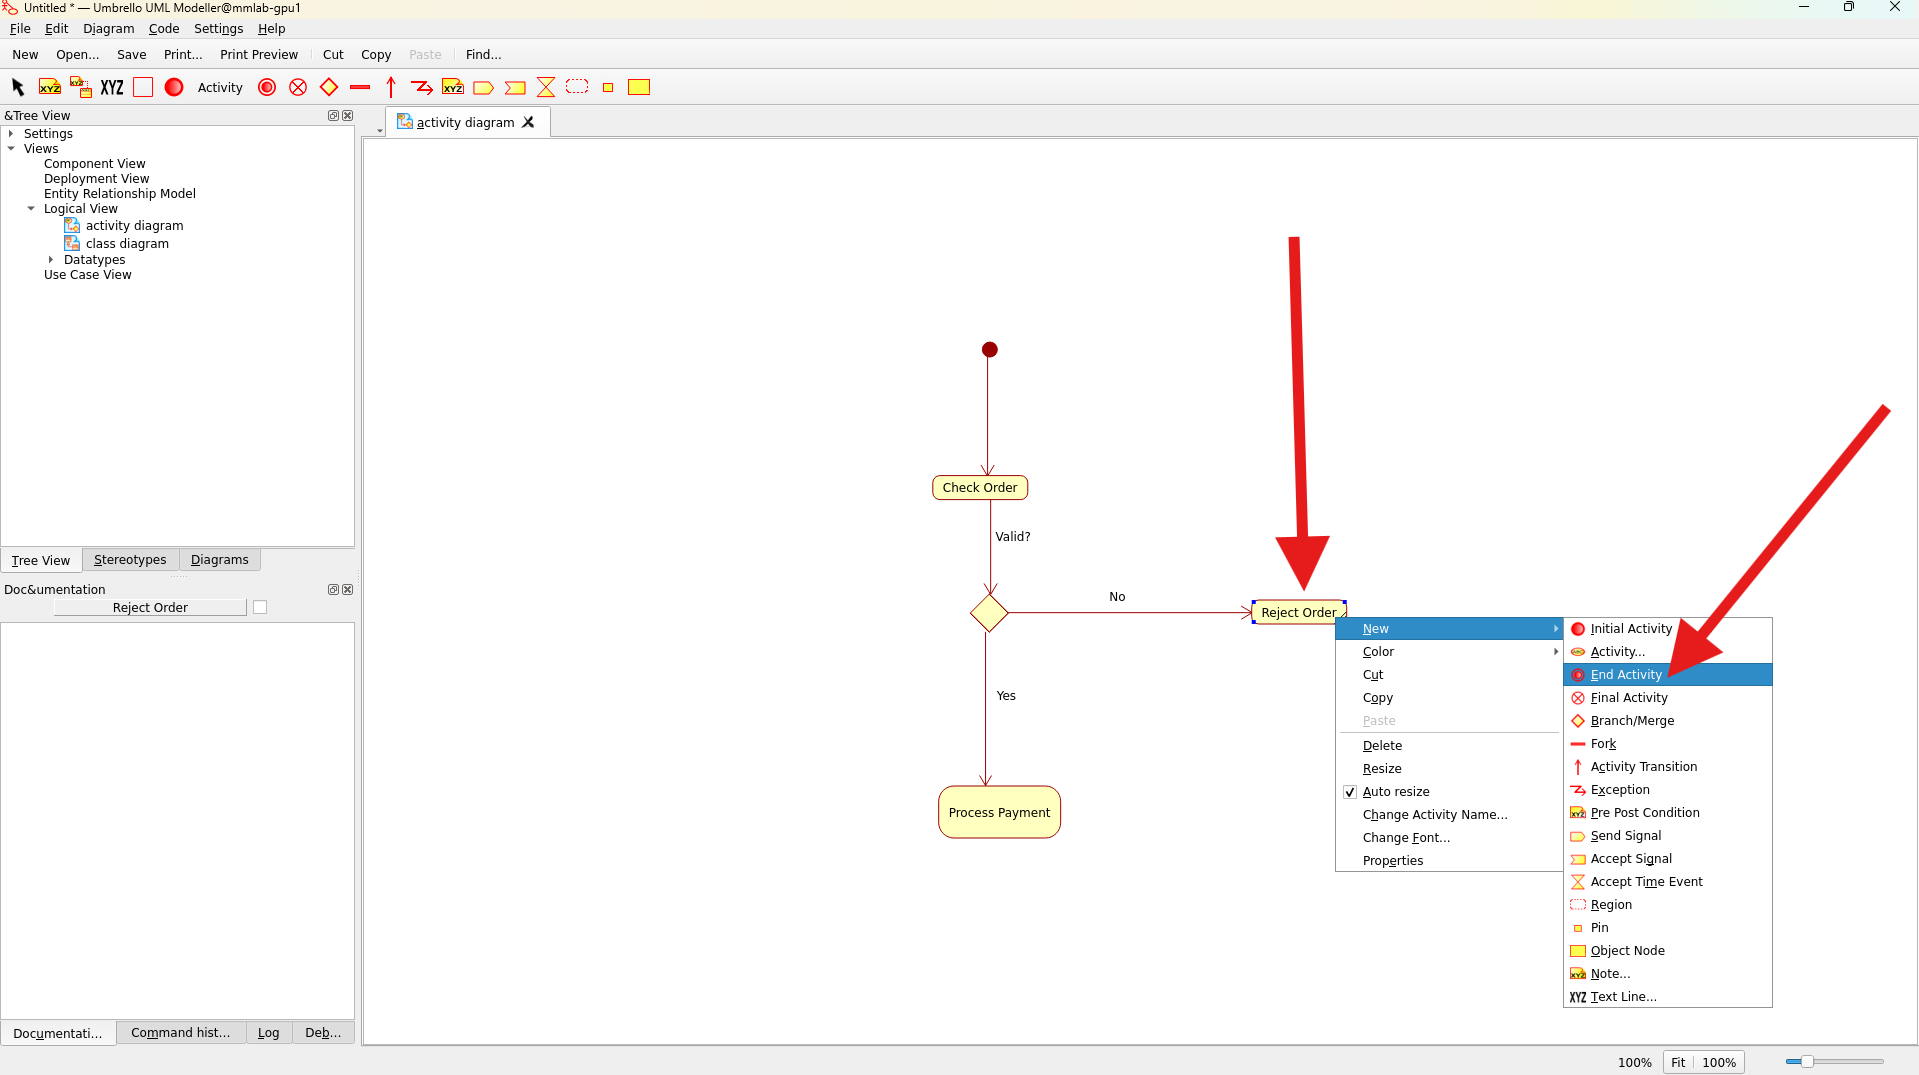 Adding end activities
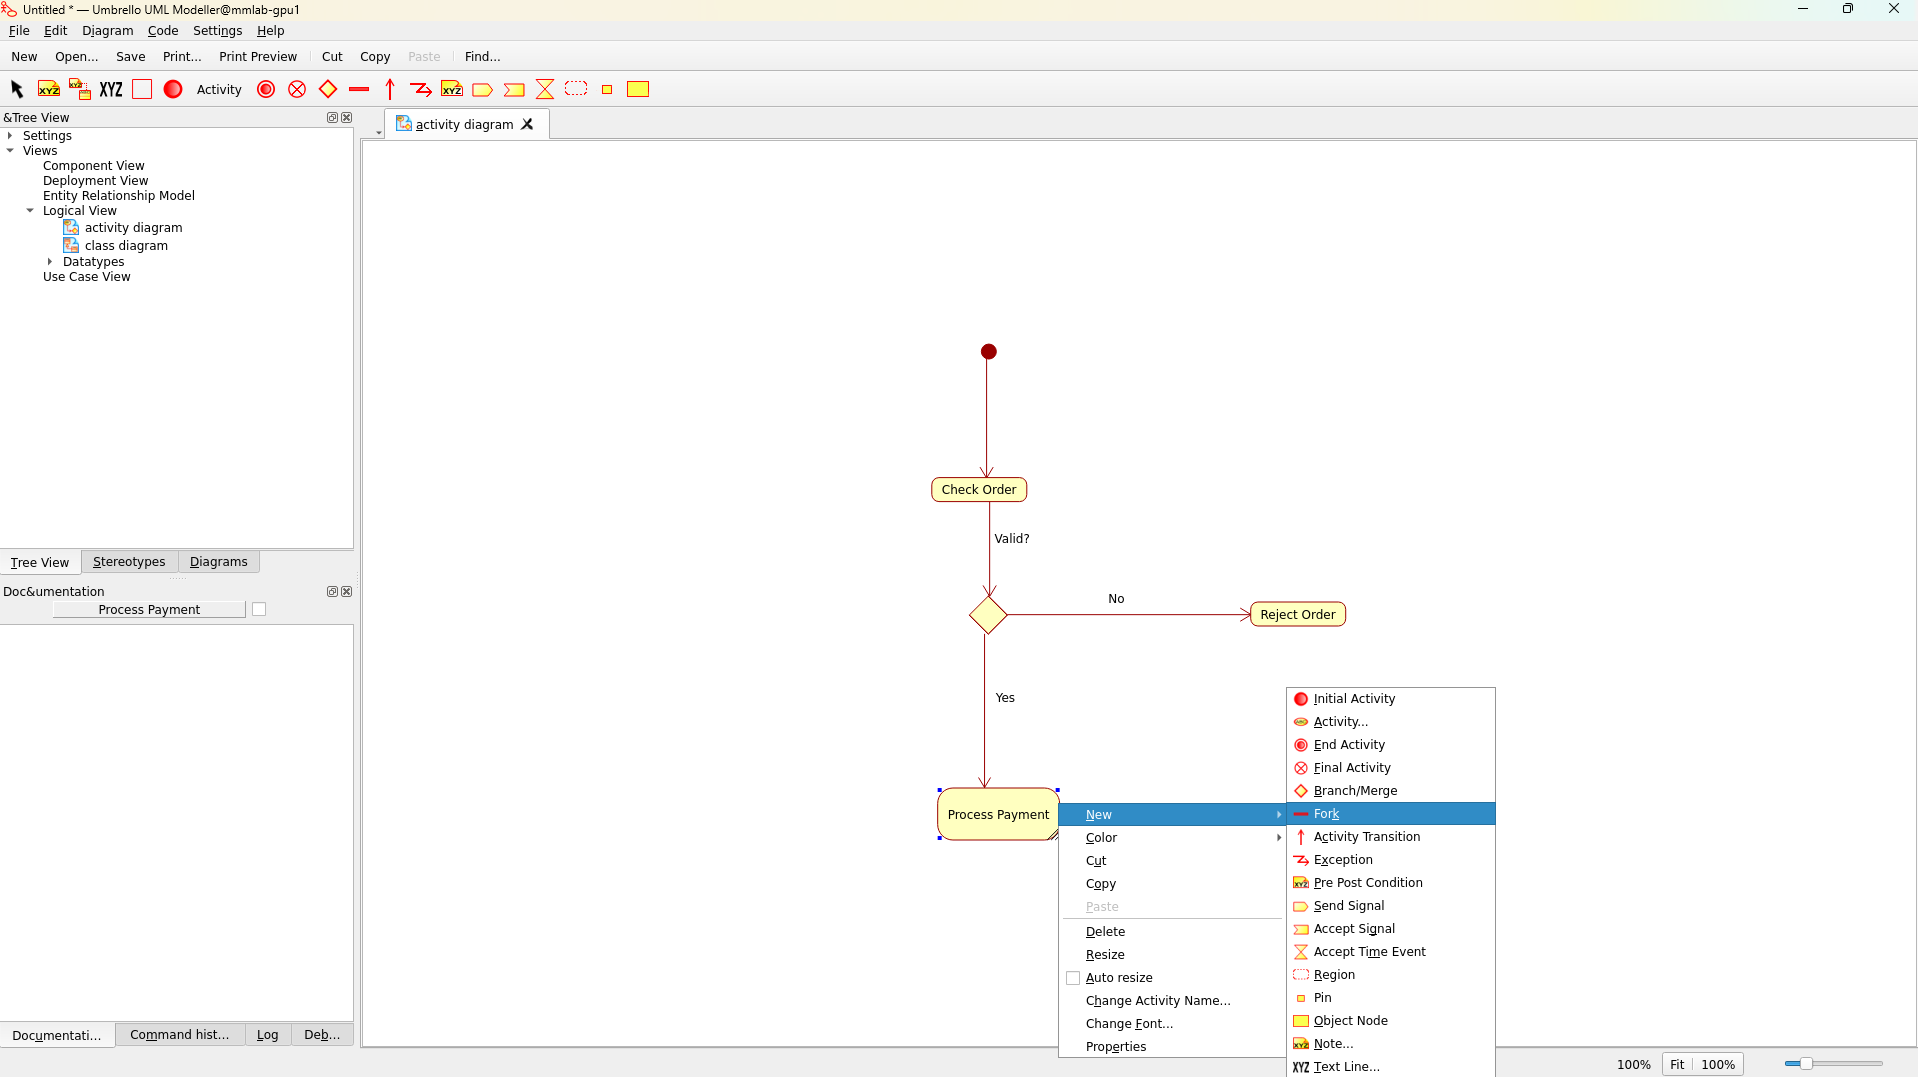
5. Working with Fork/Join Nodes
Creating Parallel Activities
- Click on Select tool, right Click on the new Activity("Process Payment") previously created
- Select New --> Fork
- In the Toolbar, Select Activity and add two more Activities
- Add activities for parallel execution (e.g., "Update Inventory", "Send Confirmation")
 Creating parallel flows
Connecting Activities and Adding Join
- Use Activity Transitions from the toolbar and select first the fork and then the activity which was created previously
- Ensure proper flow between parallel activities
- In toolbar select the Fork/Join Object and add it
- Add Activity Transitions from the Activities to Join
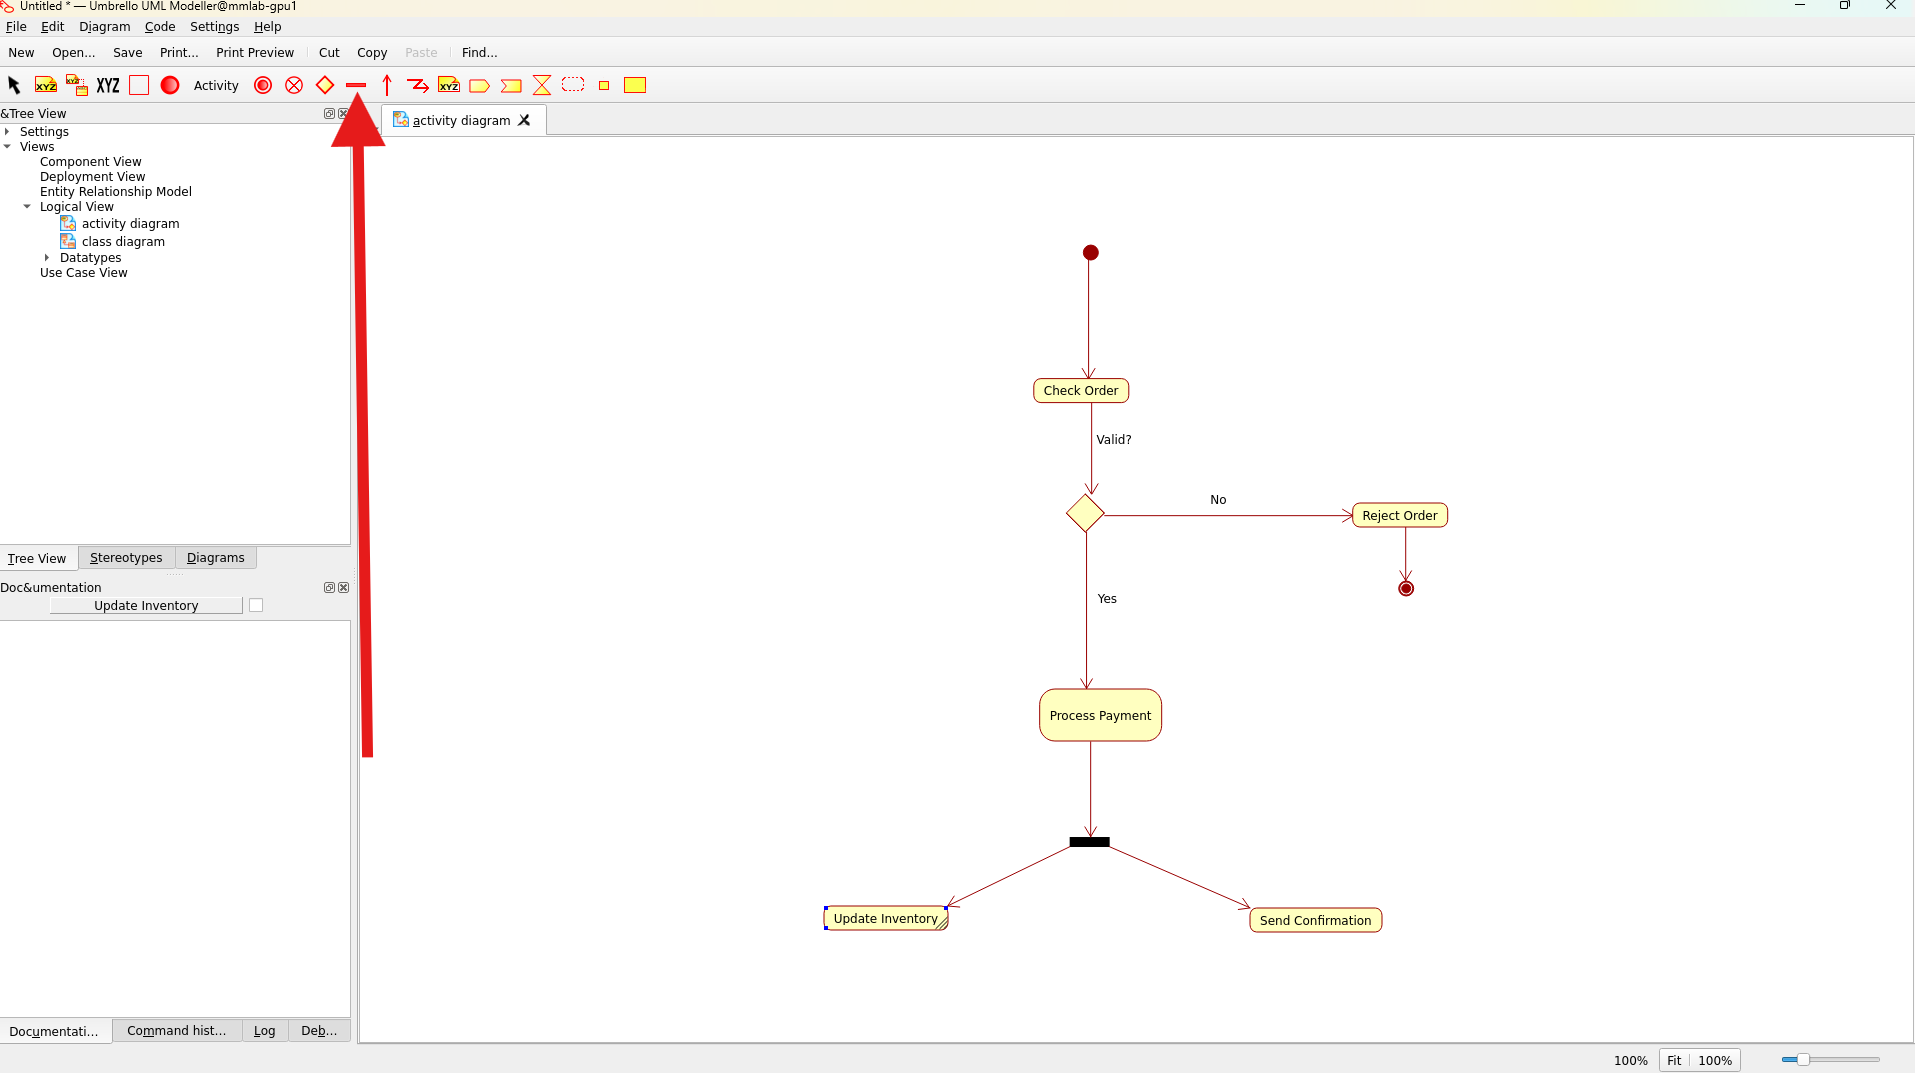
 Connecting parallel activities
6. Finalizing the Diagram
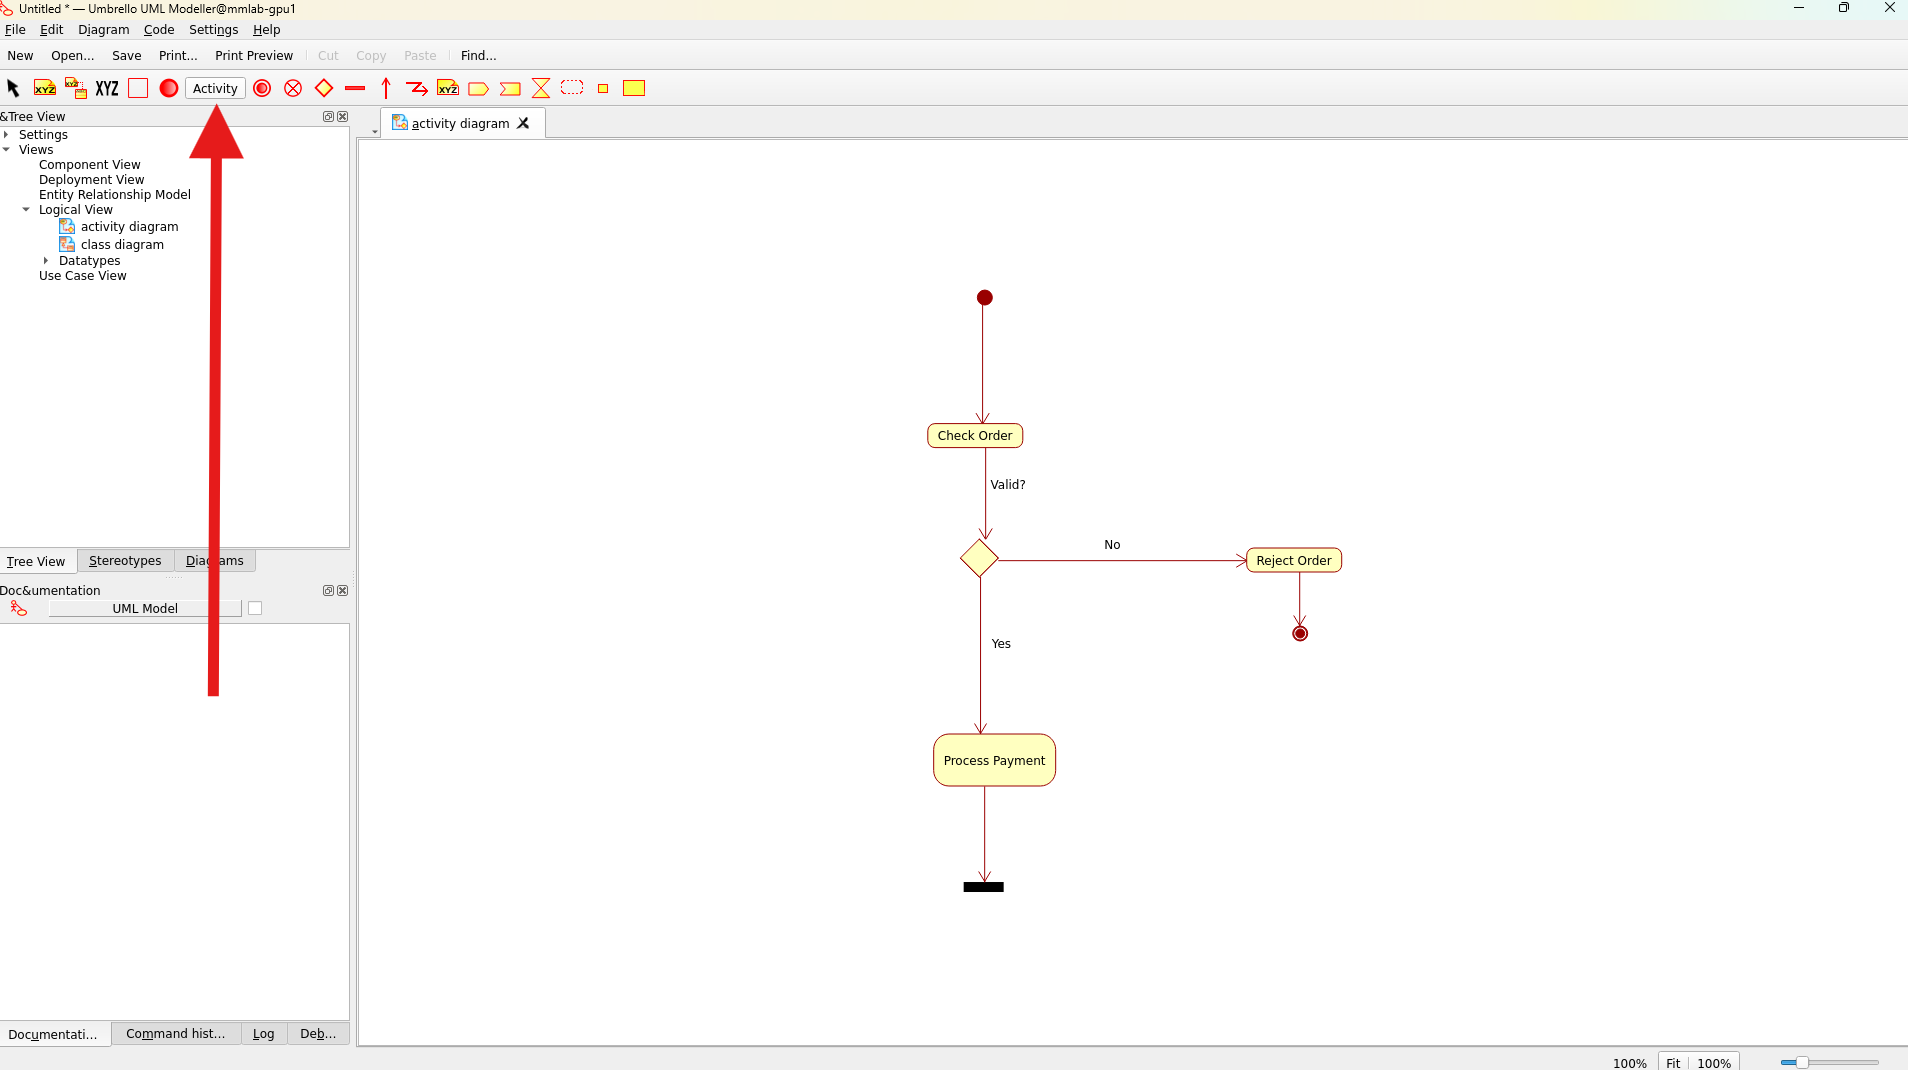
Adding Final Activity
- Add a final activity from the toolbar
- Add a final Activity Transitions from previously created Merge to Final Activity
- Click on Select Tool, Right Click on Prepare Shipment Activity, Select New --> Final Activity
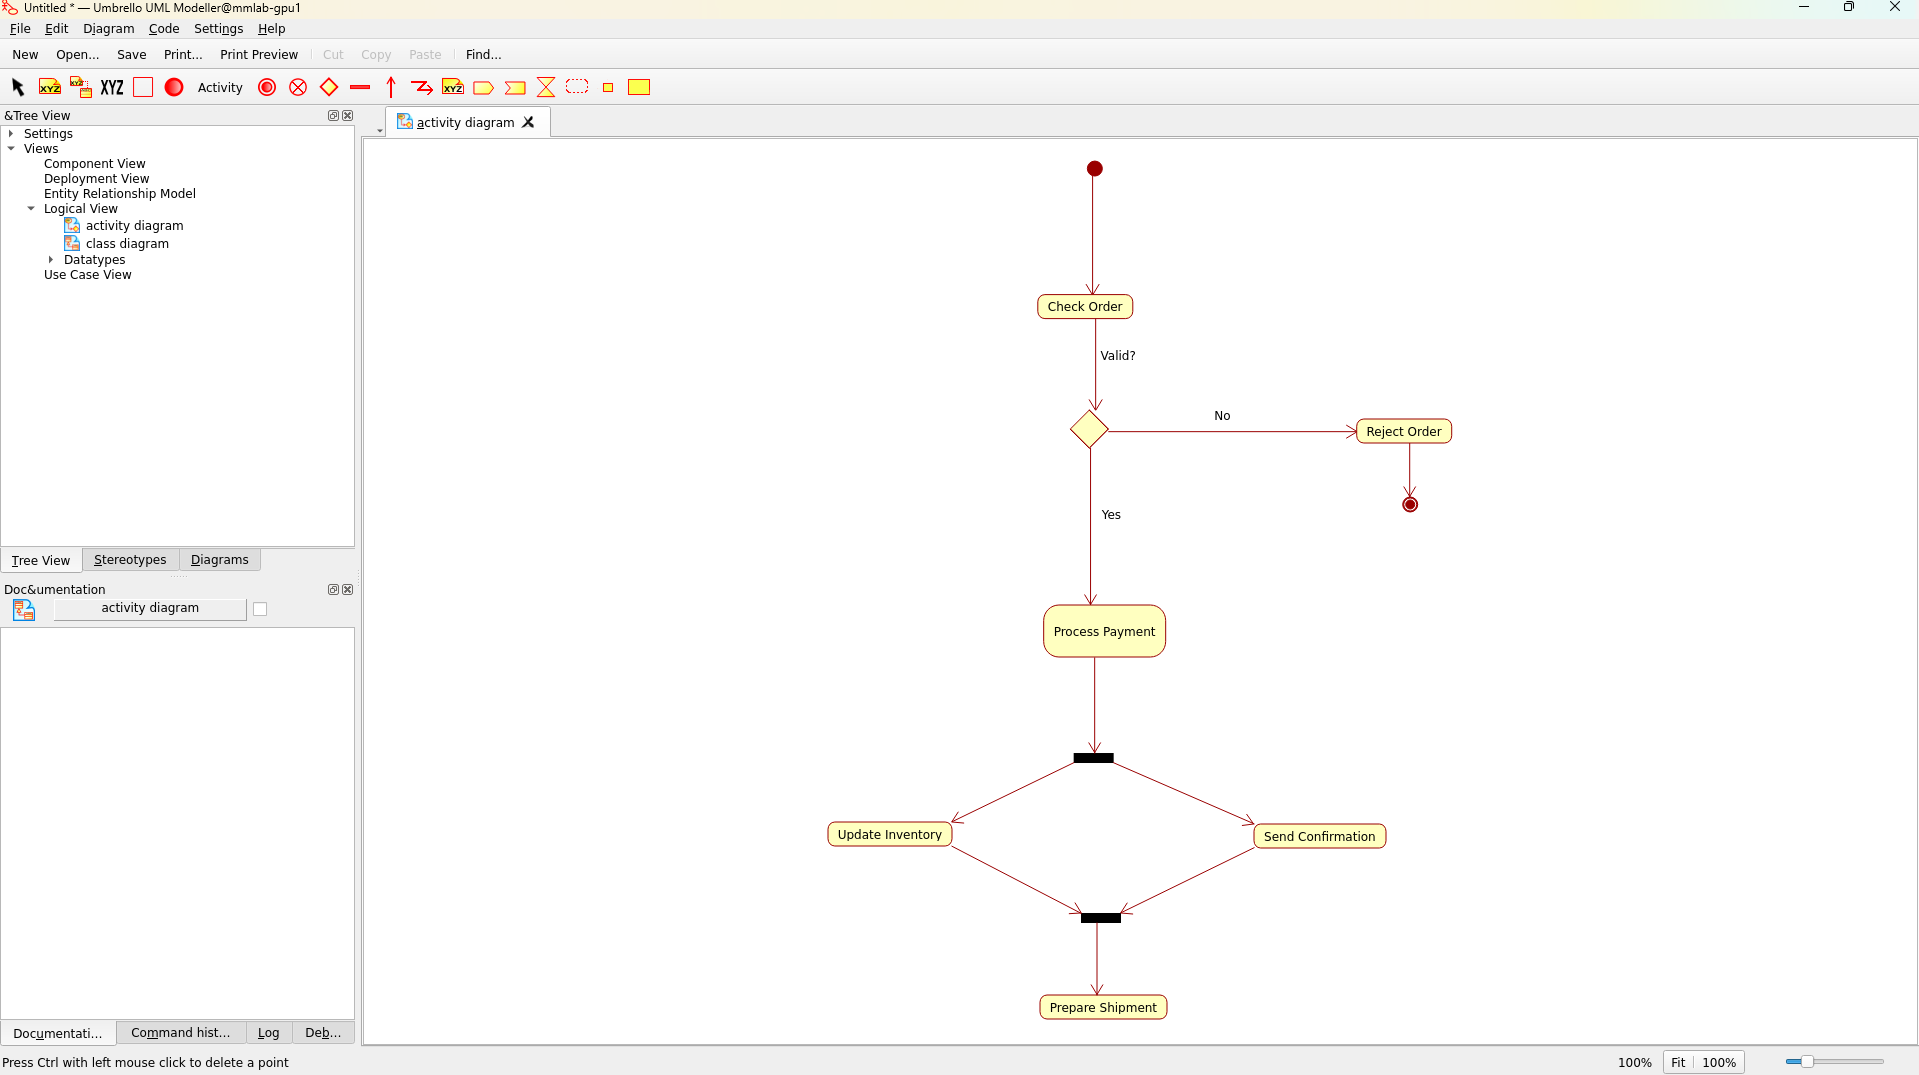
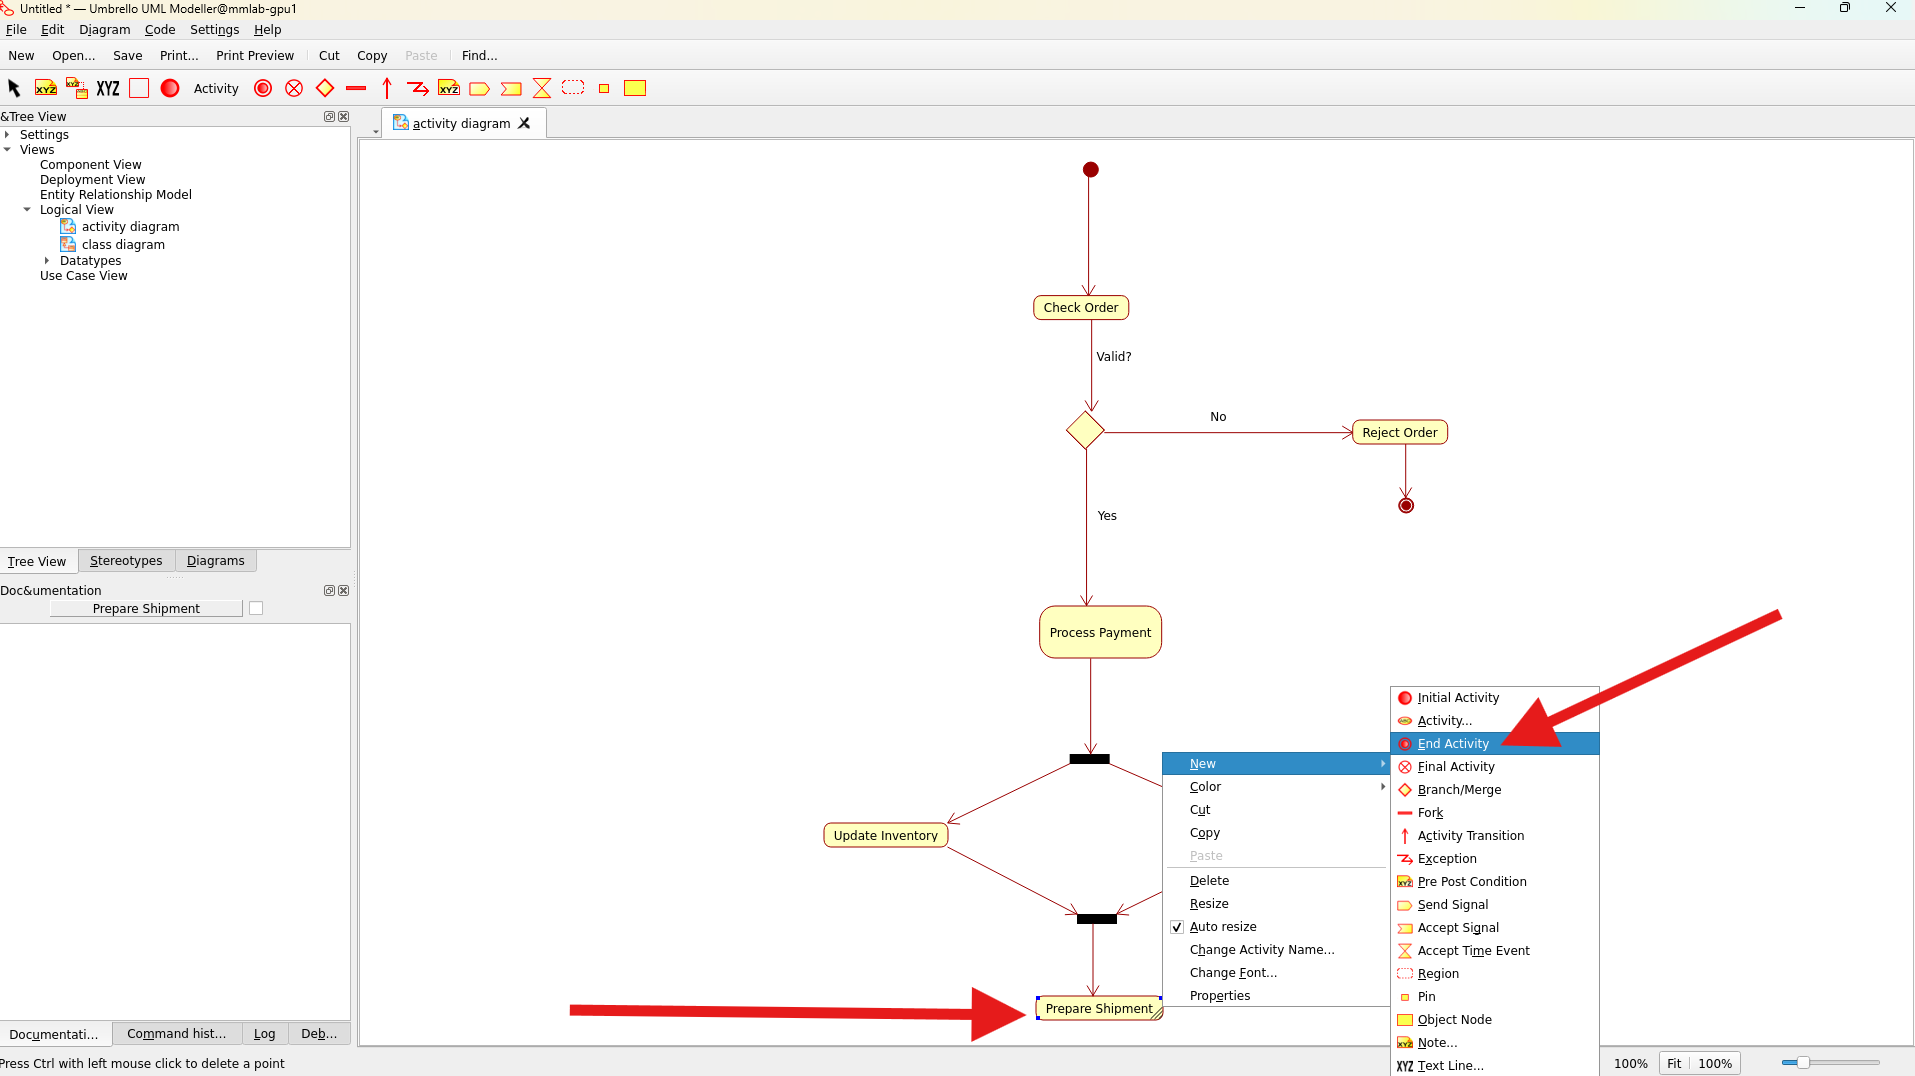 Completing the diagram
7. Saving and Exporting
Saving Your Work
- Go to File → Save As
- Choose a location and filename
- Select .xmi format
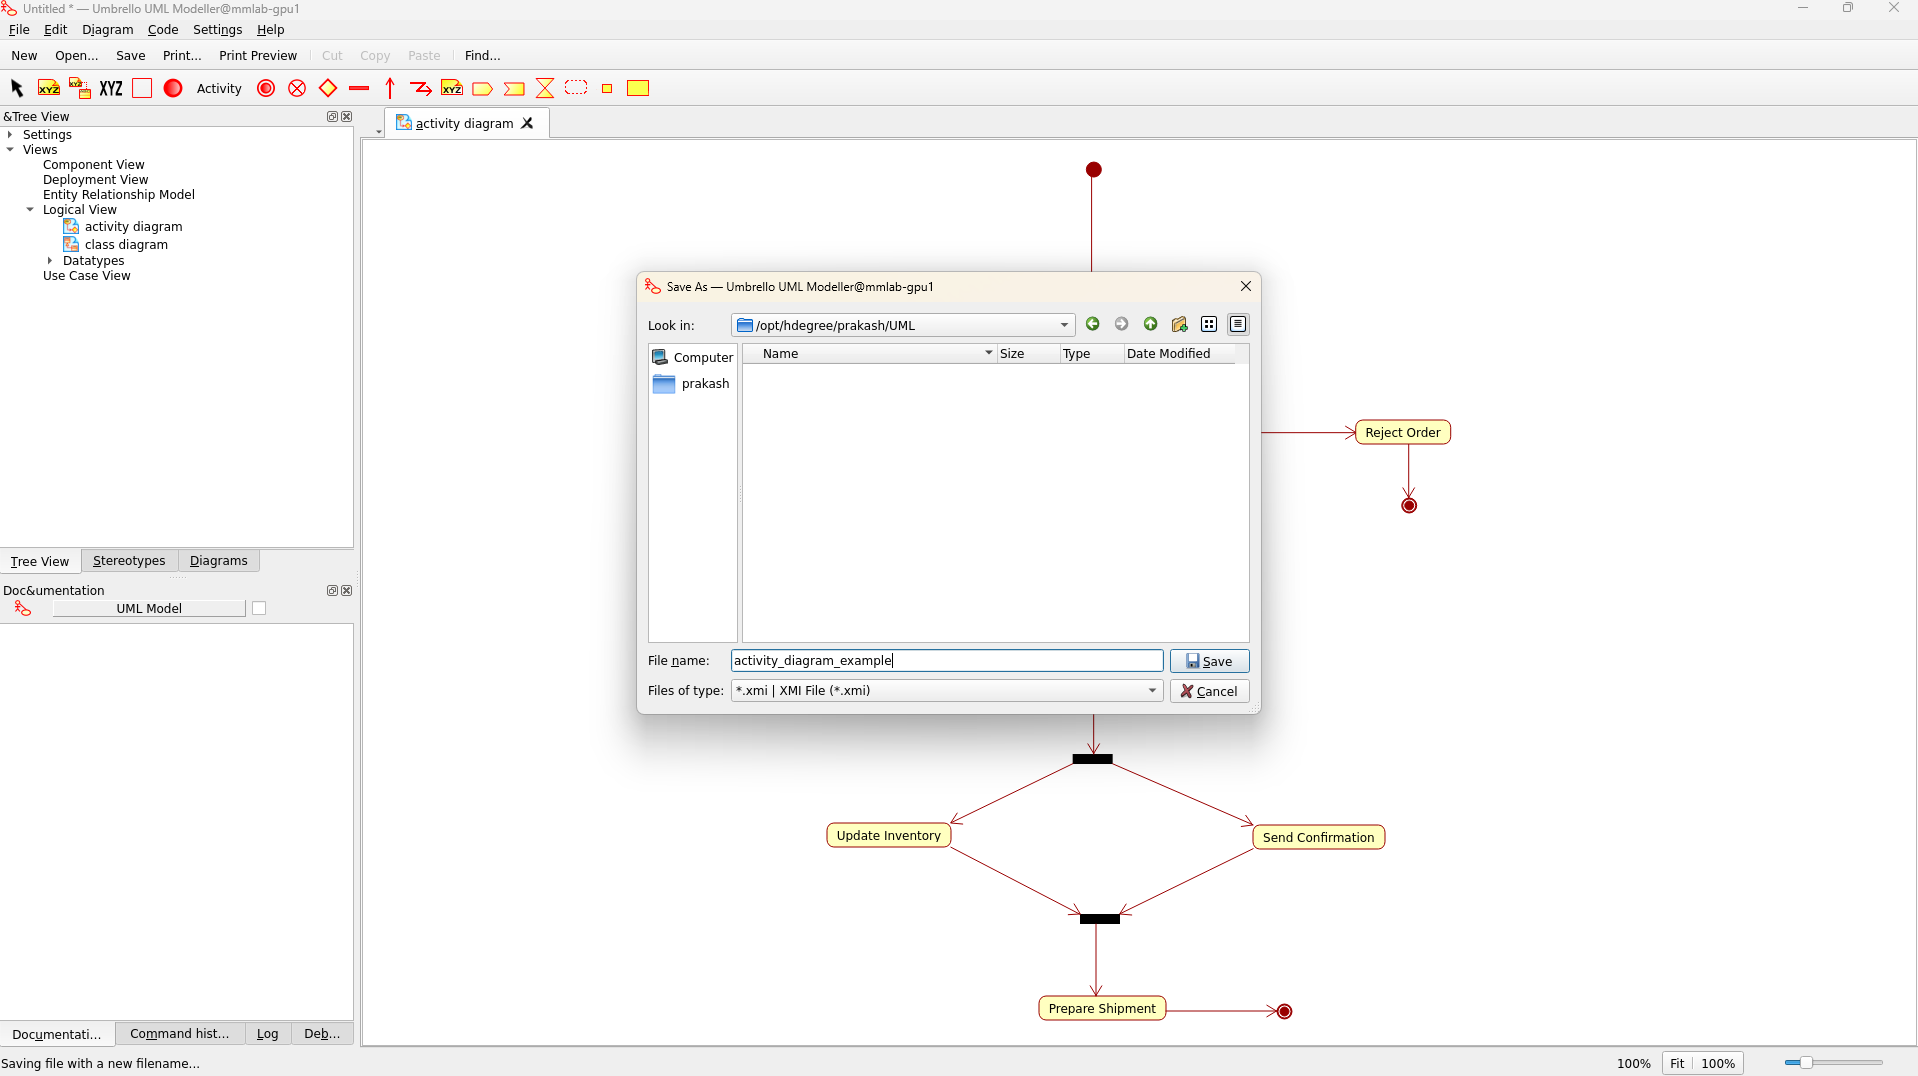 Saving your diagram
Printing or Exporting
- Go to File → Print or Export
- Select desired format and options
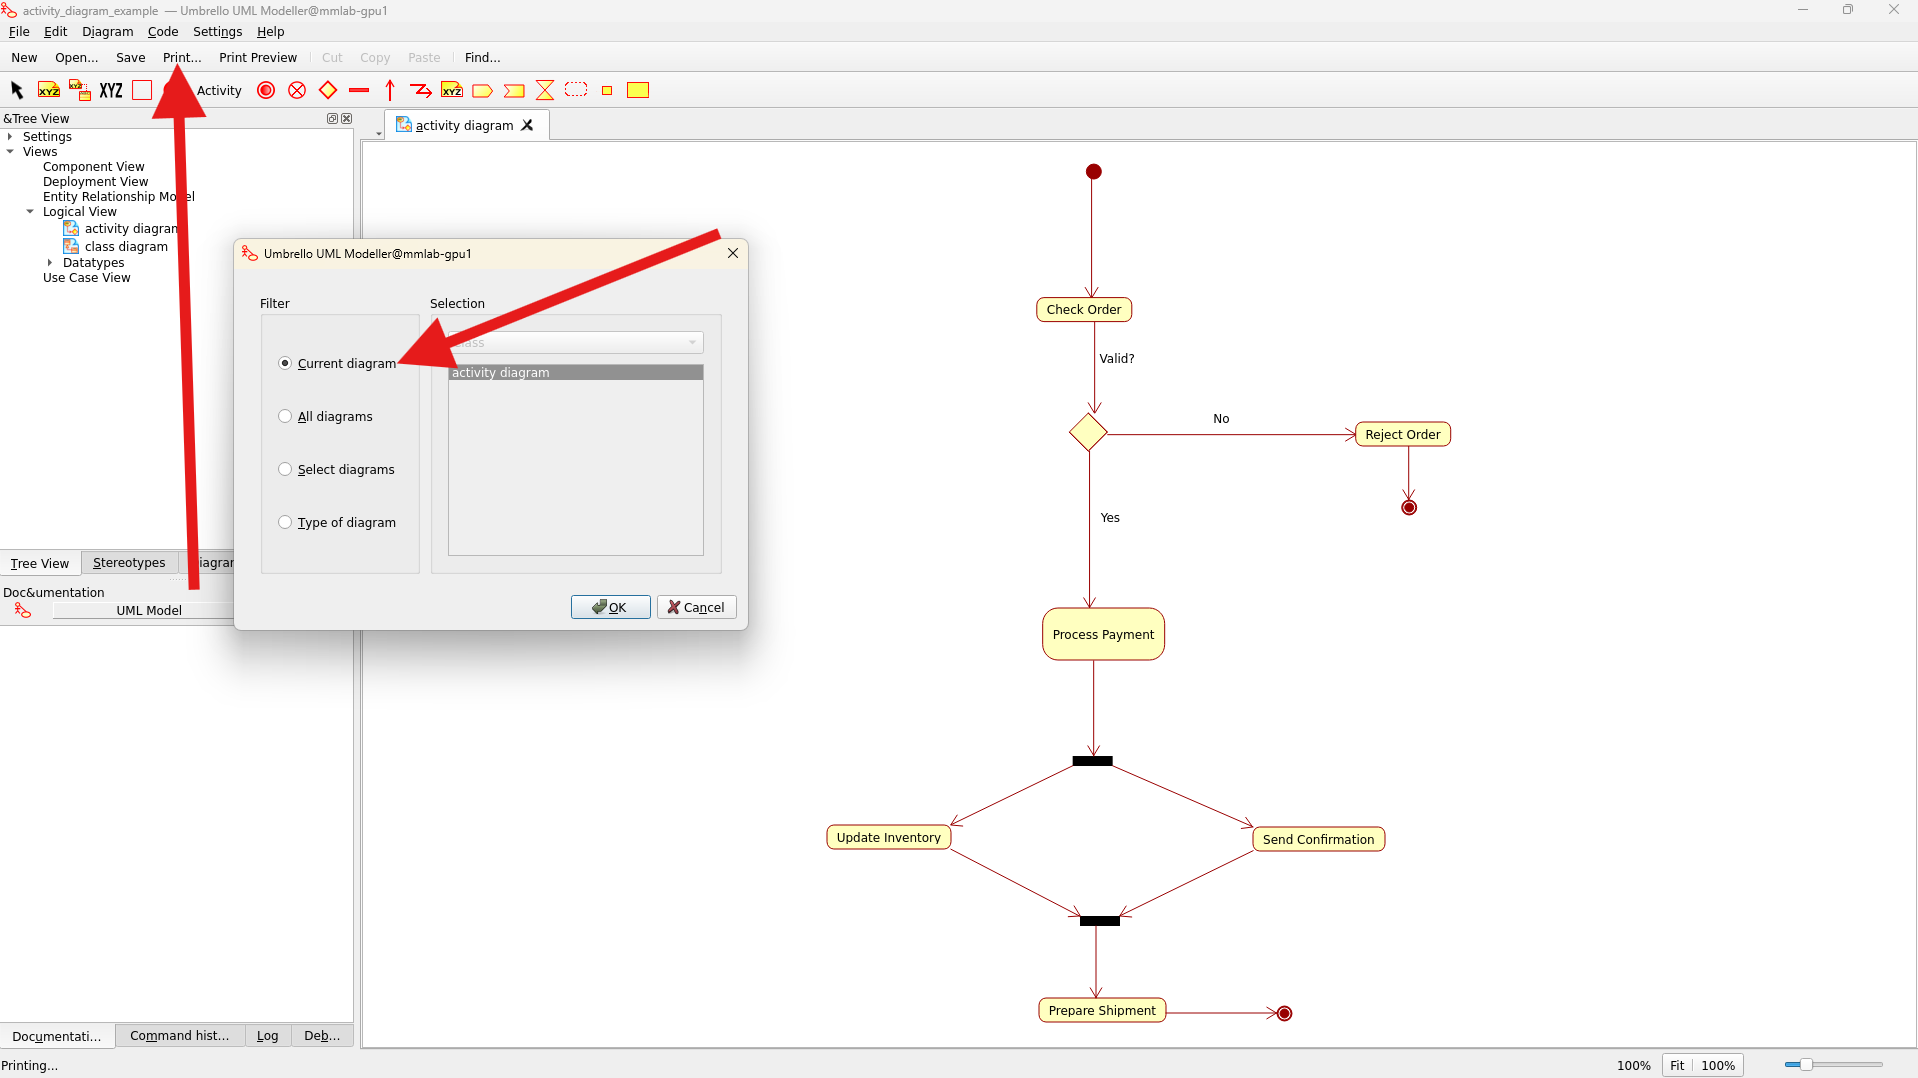 Printing or exporting your diagram
Keyboard Shortcuts
- Ctrl+S: Save
- Ctrl+Z: Undo
- Ctrl+Y: Redo
- Delete: Remove selected element