Creating Sequence Diagrams with Umbrello 5
Table of Contents
- Introduction to Sequence Diagrams
- Problem Statement: Food Ordering System
- Getting Started
- Creating Object Lifelines
- Adding Synchronous Messages
- Adding Asynchronous Messages
- Working with Activation Boxes
- Managing Destruction
- Saving and Exporting
- Keyboard Shortcuts
1. Introduction to Sequence Diagrams
Sequence diagrams in UML visualize the interactions between objects over time. They are particularly useful for:
- Showing the sequence of messages/method calls between objects
- Illustrating how processes operate with one another
- Documenting runtime scenarios in a graphical manner
- Representing complex interactions in a time-ordered manner
Key components of sequence diagrams include:
- Lifelines: Represent individual objects or components in the system
- Messages: Show interactions between lifelines
- Activation Boxes: Indicate when an object is actively processing
- Return Messages: Represent the completion of processing and return of control
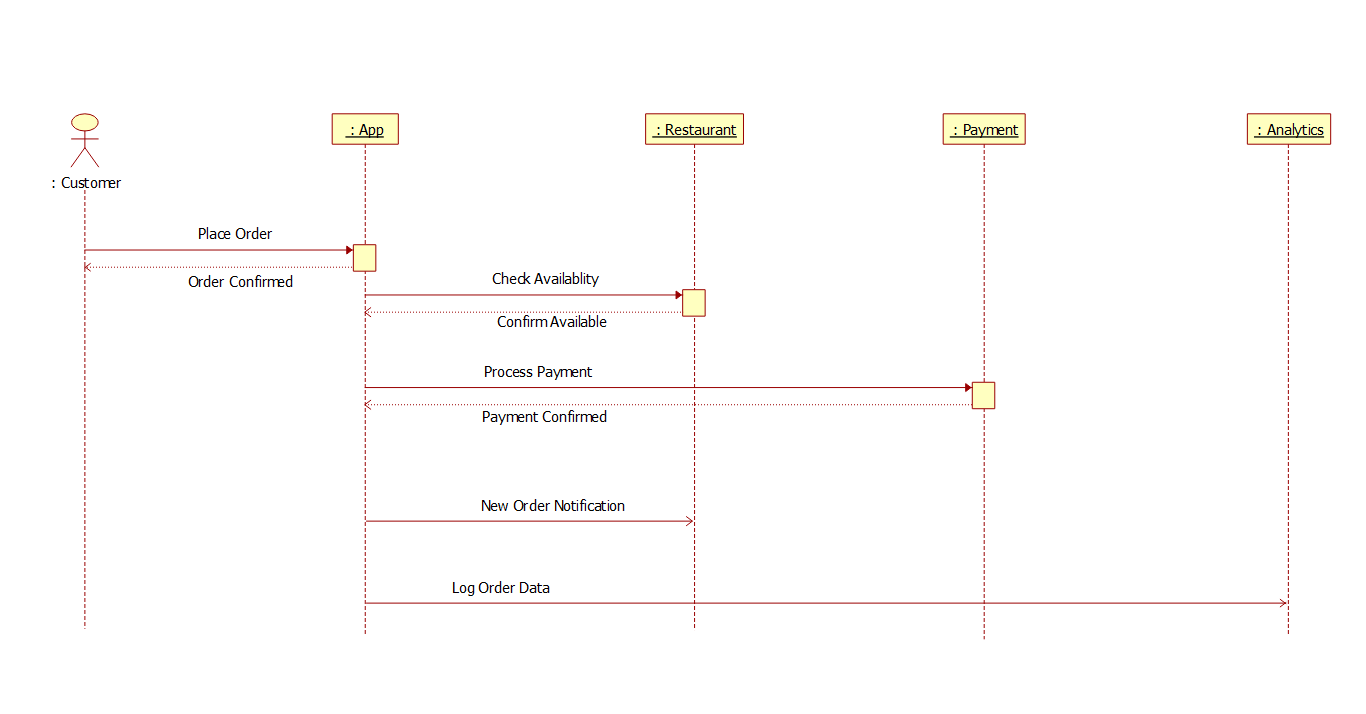 Completed sequence diagram for a food ordering system
2. Problem Statement: Food Ordering System
In this tutorial, we'll create a sequence diagram for an online food ordering system with the following components:
- Customer: Places orders and receives confirmations
- App: Manages the ordering process
- Restaurant: Provides availability information and receives order notifications
- Payment: Processes transactions
- Analytics: Logs order data for business intelligence
The sequence includes:
- Customer placing an order
- App checking restaurant availability
- Processing payment
- Notifying the restaurant (asynchronous)
- Logging order data (asynchronous)
This example demonstrates both synchronous operations (which require waiting for responses) and asynchronous operations (which continue without waiting).
3. Getting Started
Creating a New Sequence Diagram
-
Launch Umbrello 5
-
Go to Diagram → New → Sequence Diagram
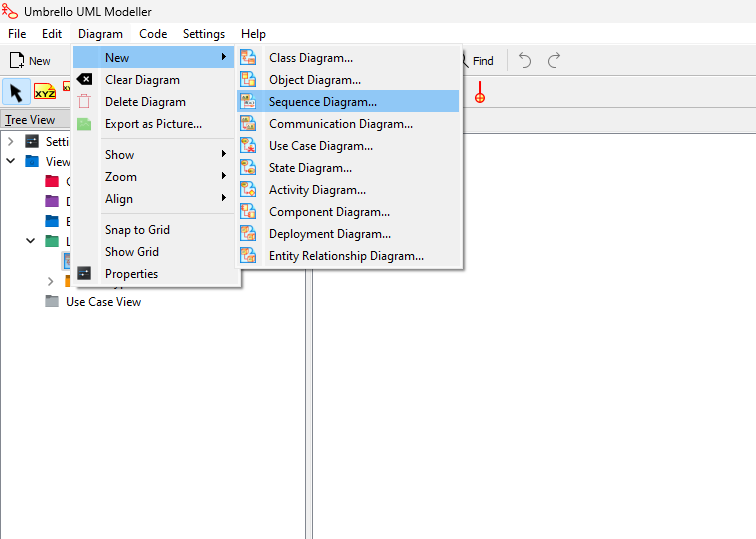 Creating a new sequence diagram
 -
Name your diagram (e.g., "Food Ordering System Sequence")
4. Creating Object Lifelines
Adding the First Object
- Right-click on the blank diagram
- Select New → Object
- Click on the diagram where you want to place it
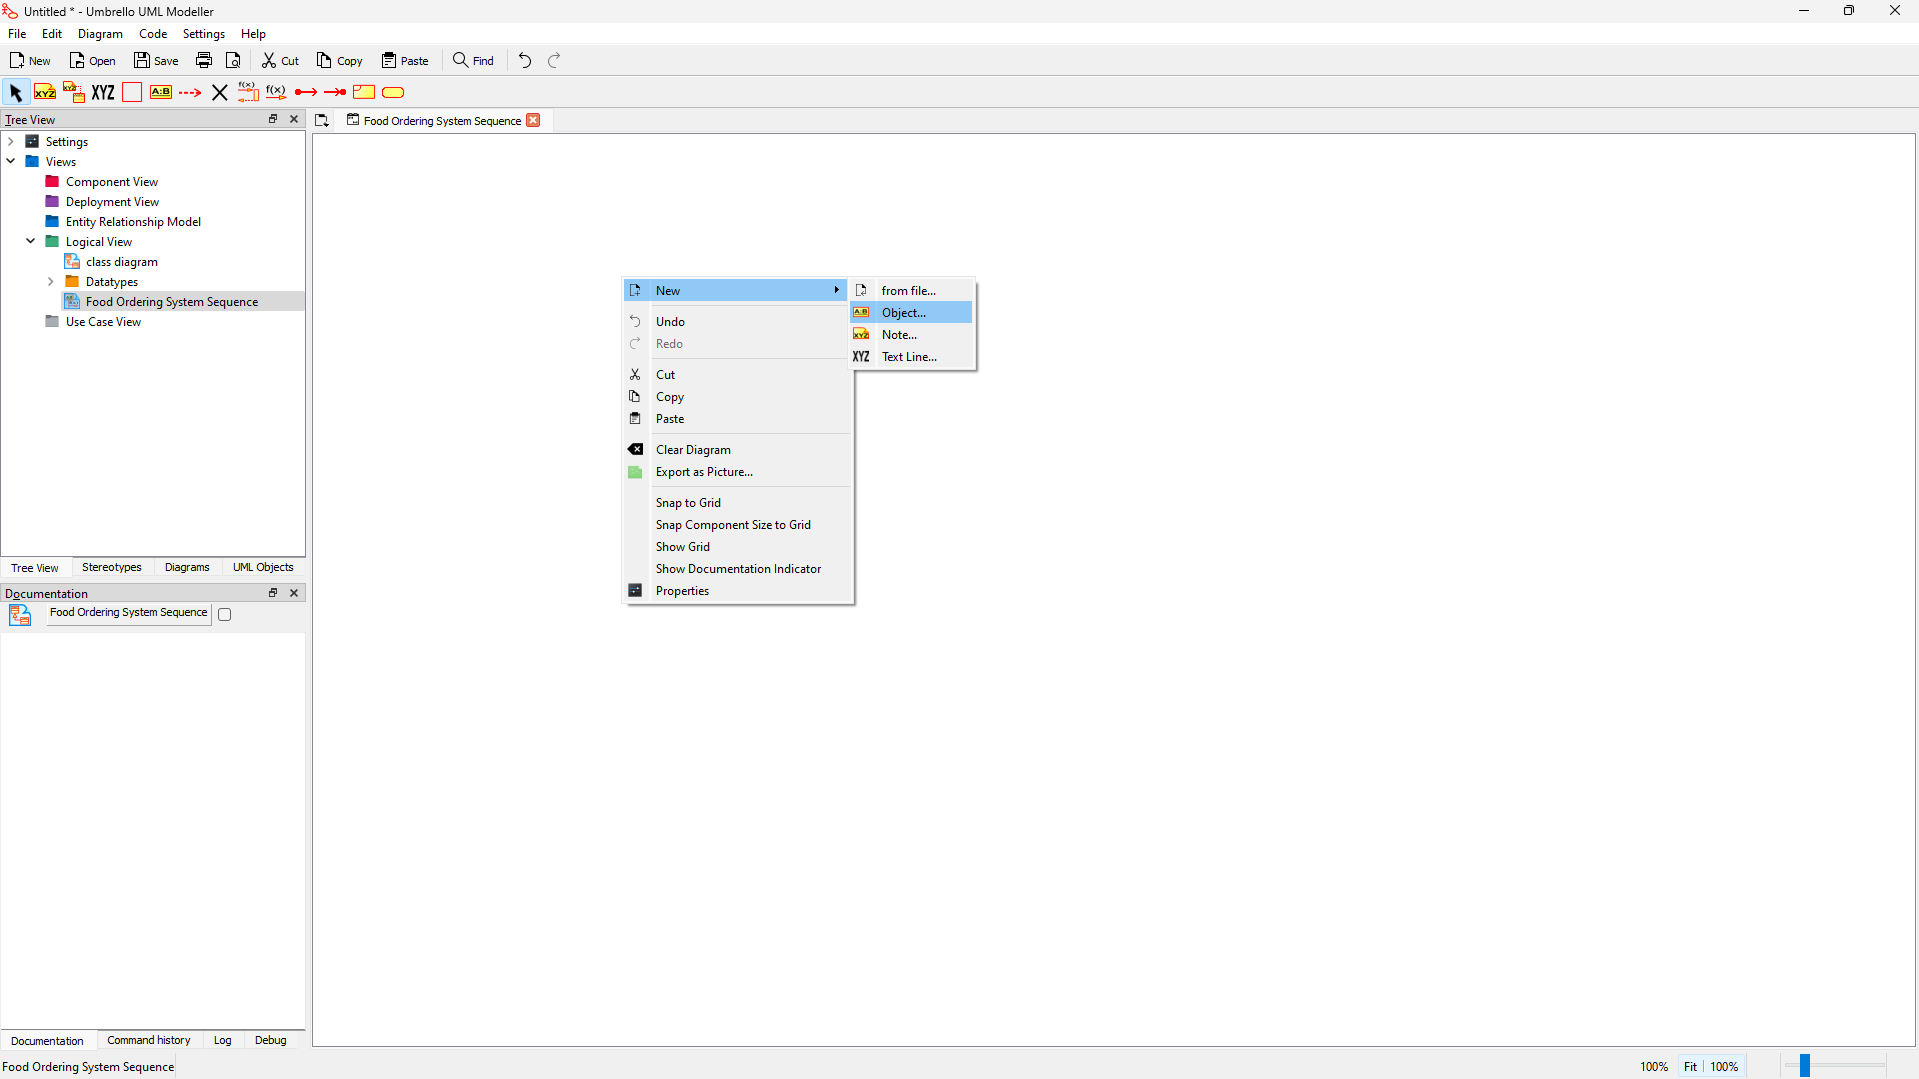 Creating a new object
Setting Object Properties
-
Right-click on the newly created object
-
Select Properties
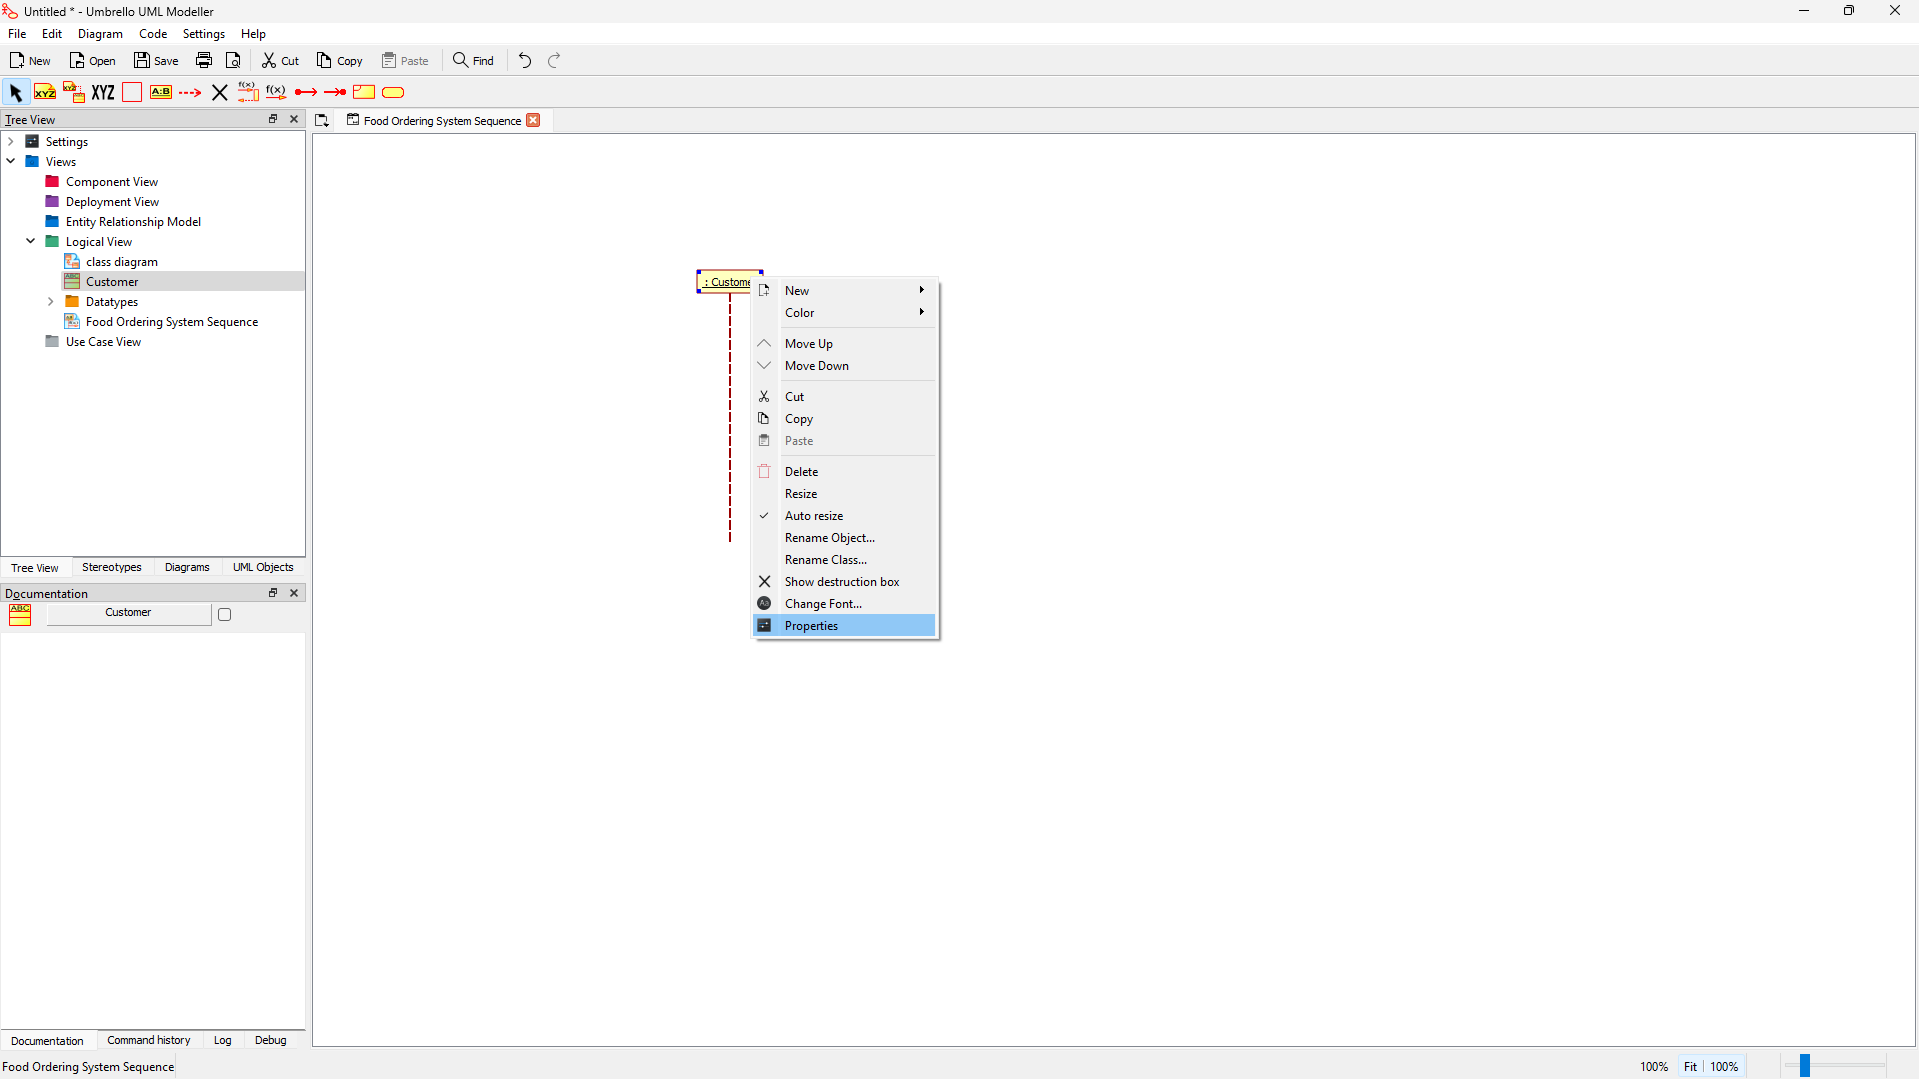 Opening object properties
 -
Change the class name to "Customer"
-
Check "Draw as actor" to represent a user
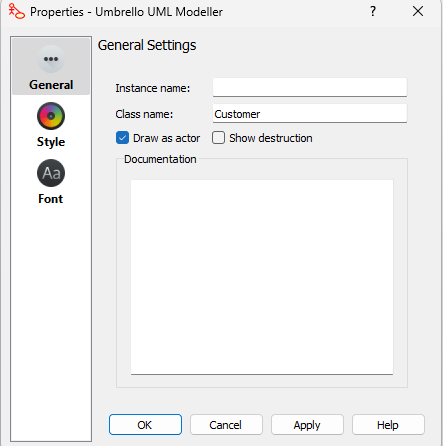 Setting an object as an actor
 -
Click OK to apply changes
Adding More Objects
- Repeat the process to add more objects:
- App
- Restaurant
- Payment
- Analytics
- Position them in a horizontal row at the top of the diagram
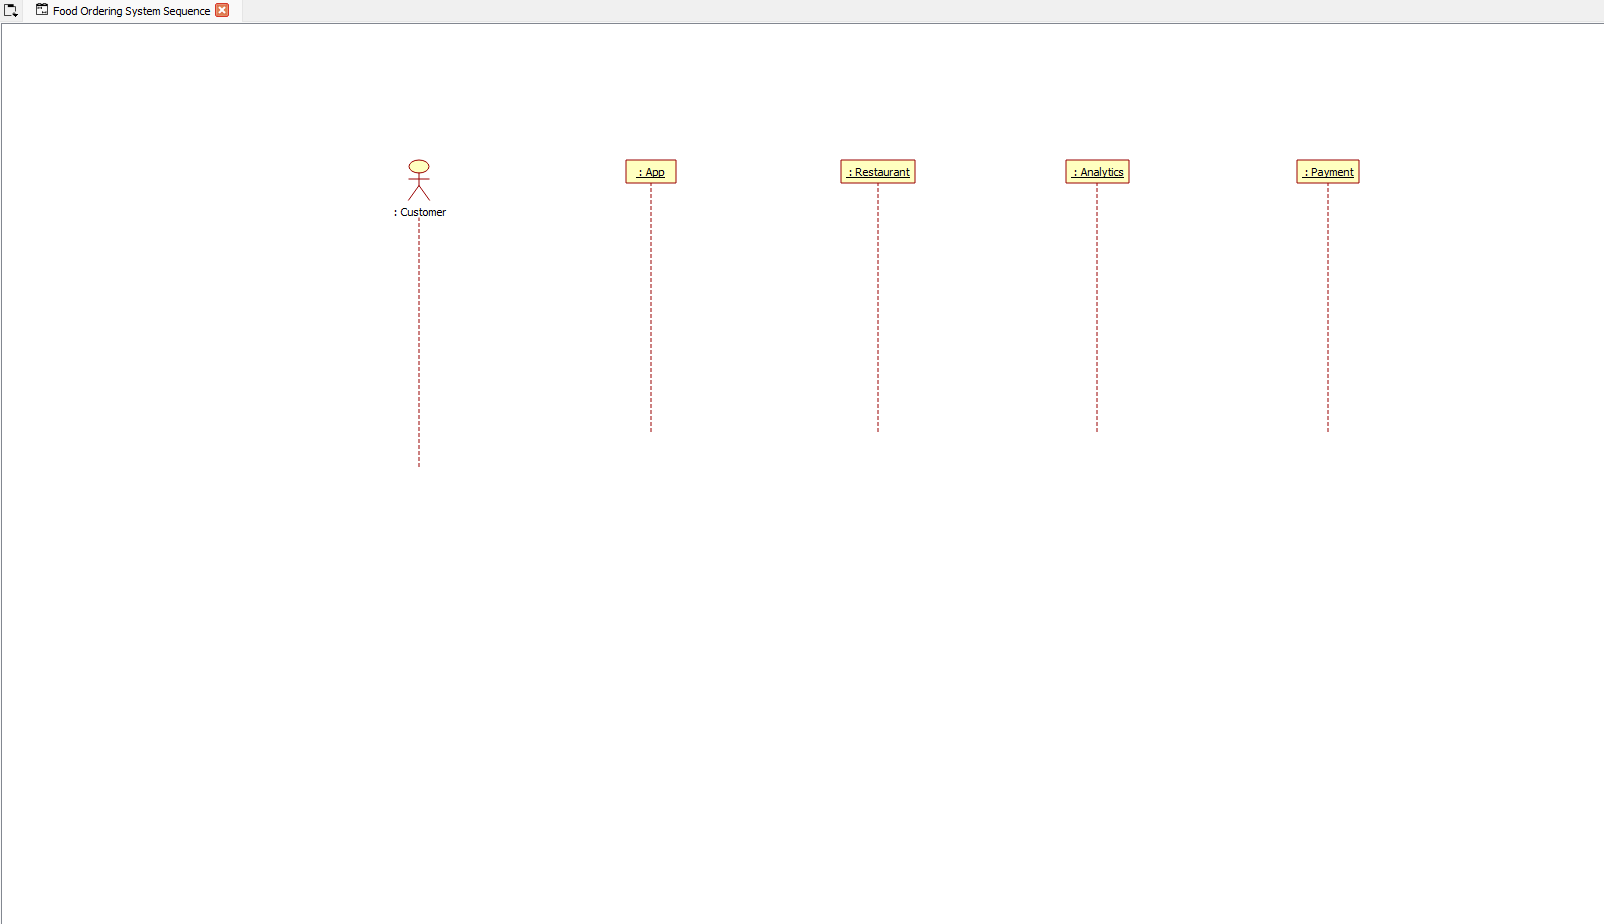 Adding more object lifelines
5. Adding Synchronous Messages
Creating the First Synchronous Message
-
Click on the Synchronous Message tool in the toolbar
-
Click and drag from the source object (Customer) to the target object (App)
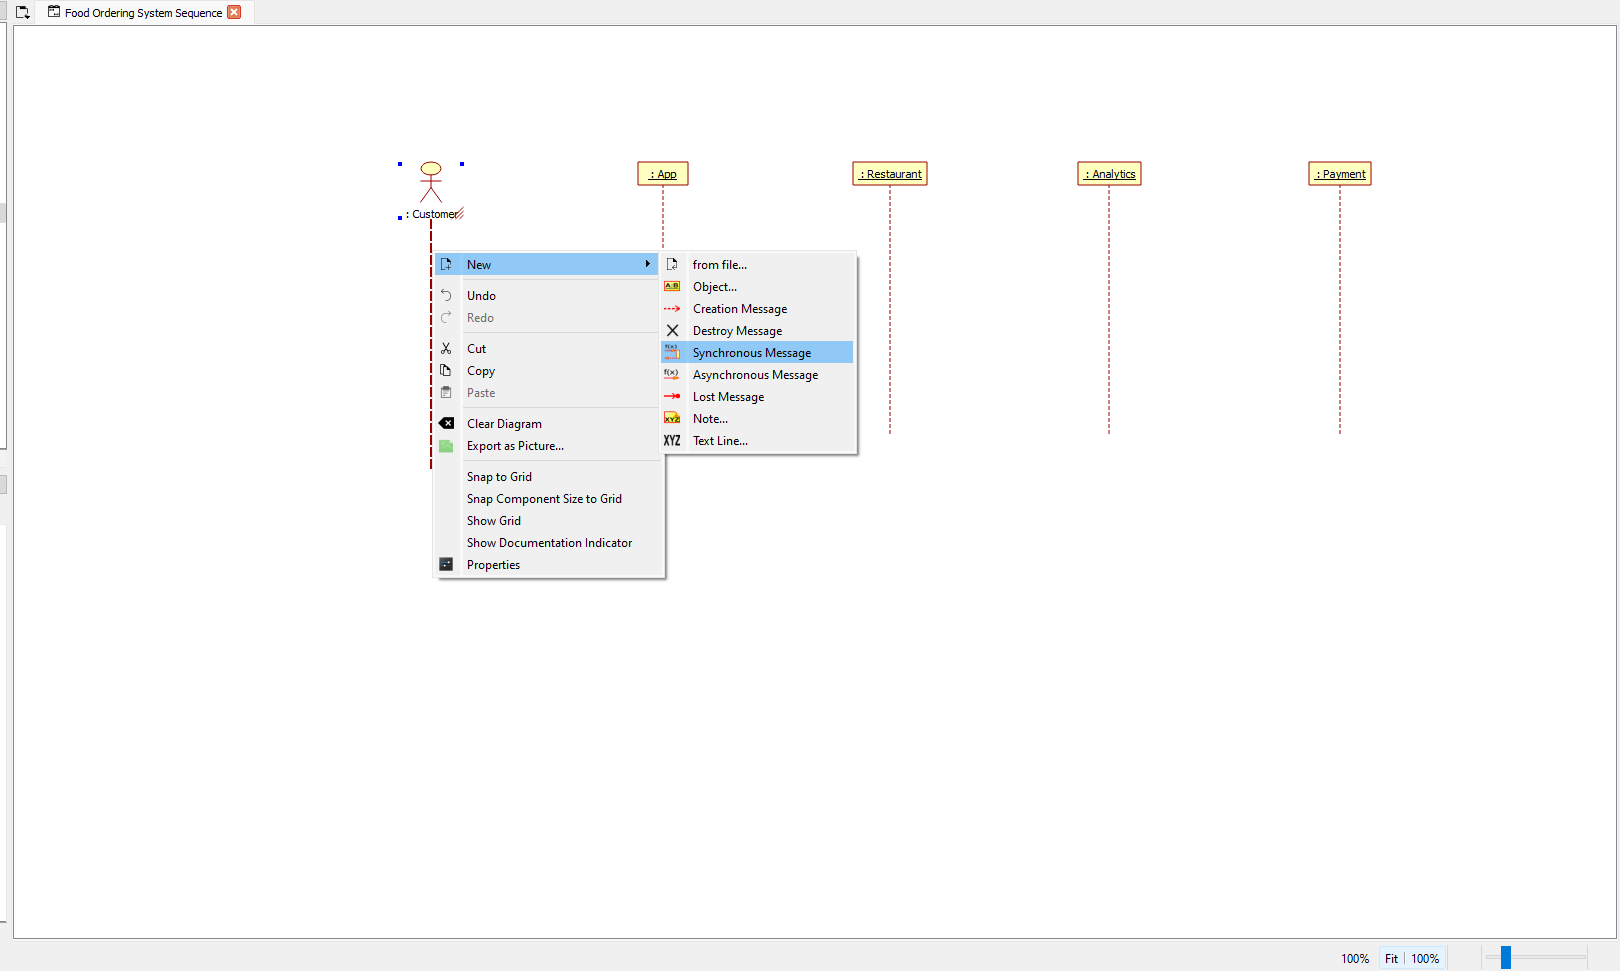 Creating a synchronous message
 -
In the dialog that appears, enter "Place Order" as the custom operation
 Setting the message name
 -
Select the Label tool, and then add a return message
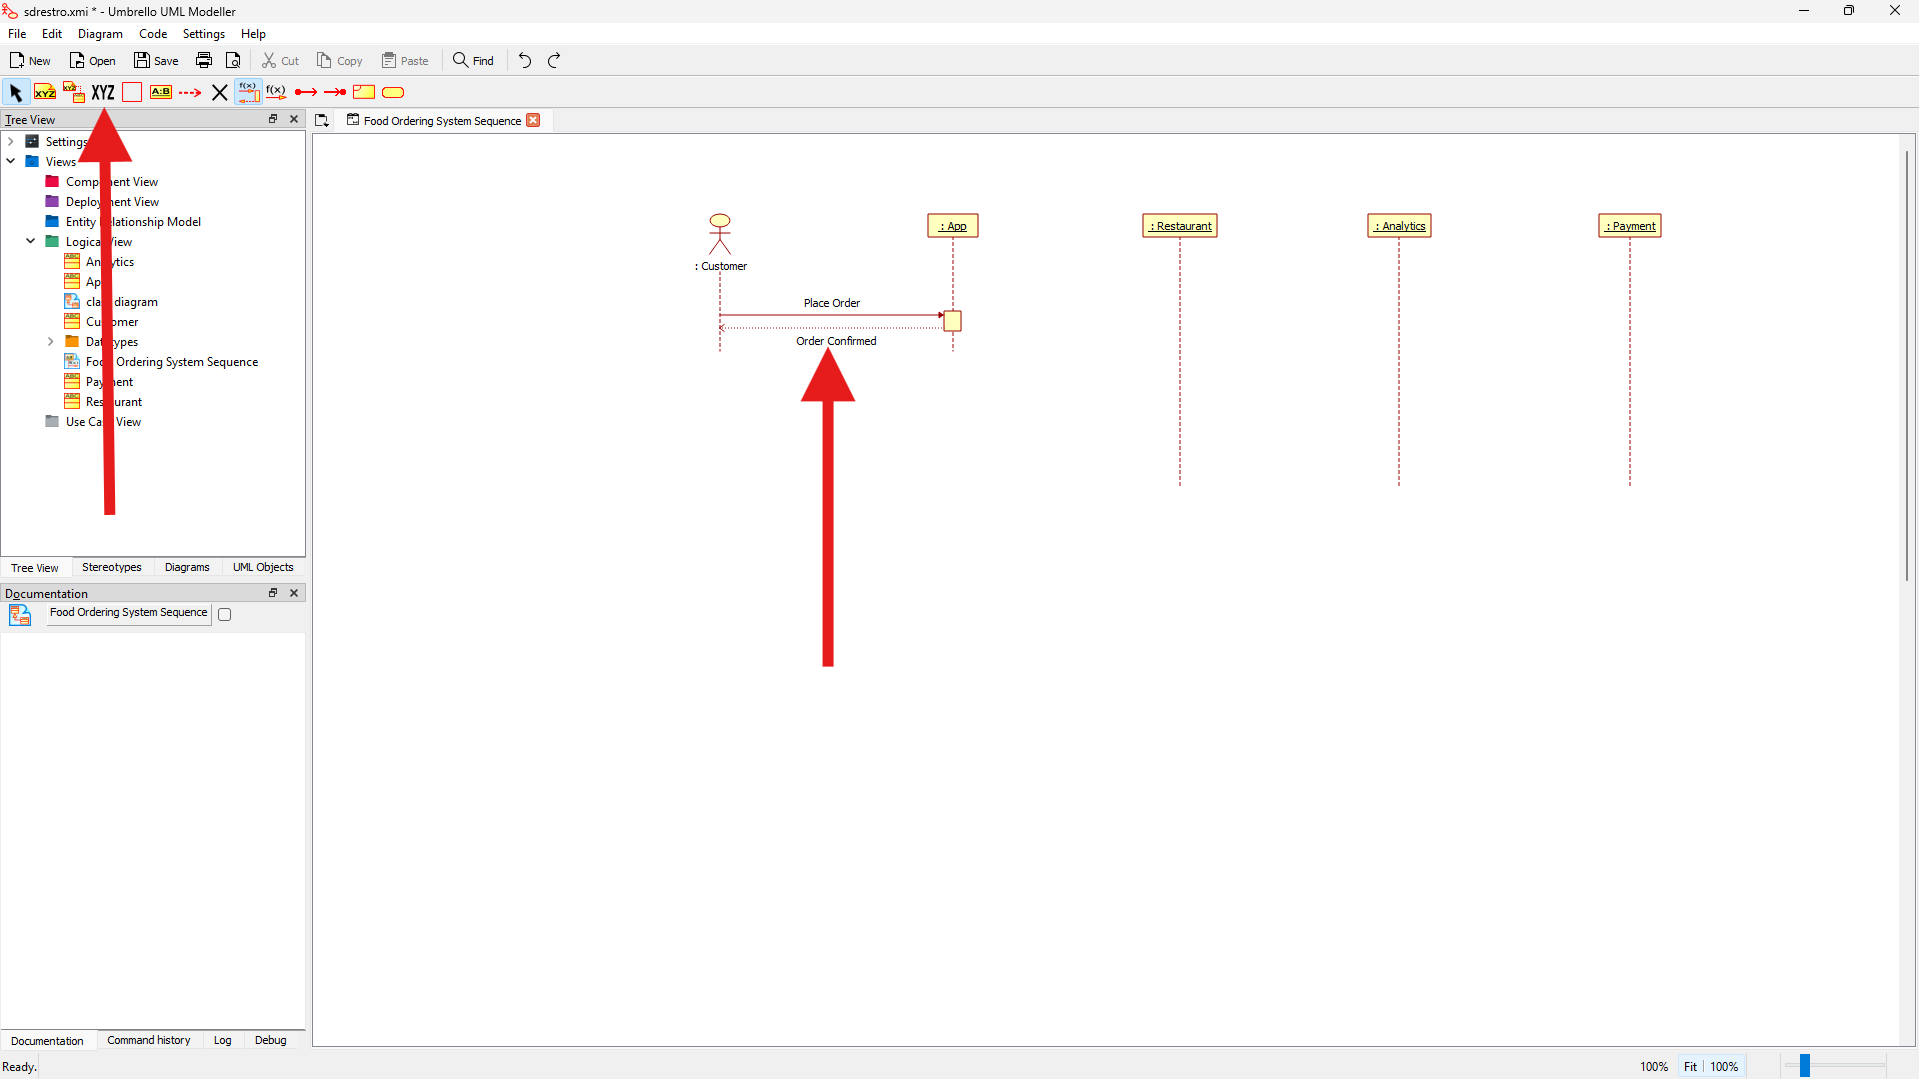 Message with label added
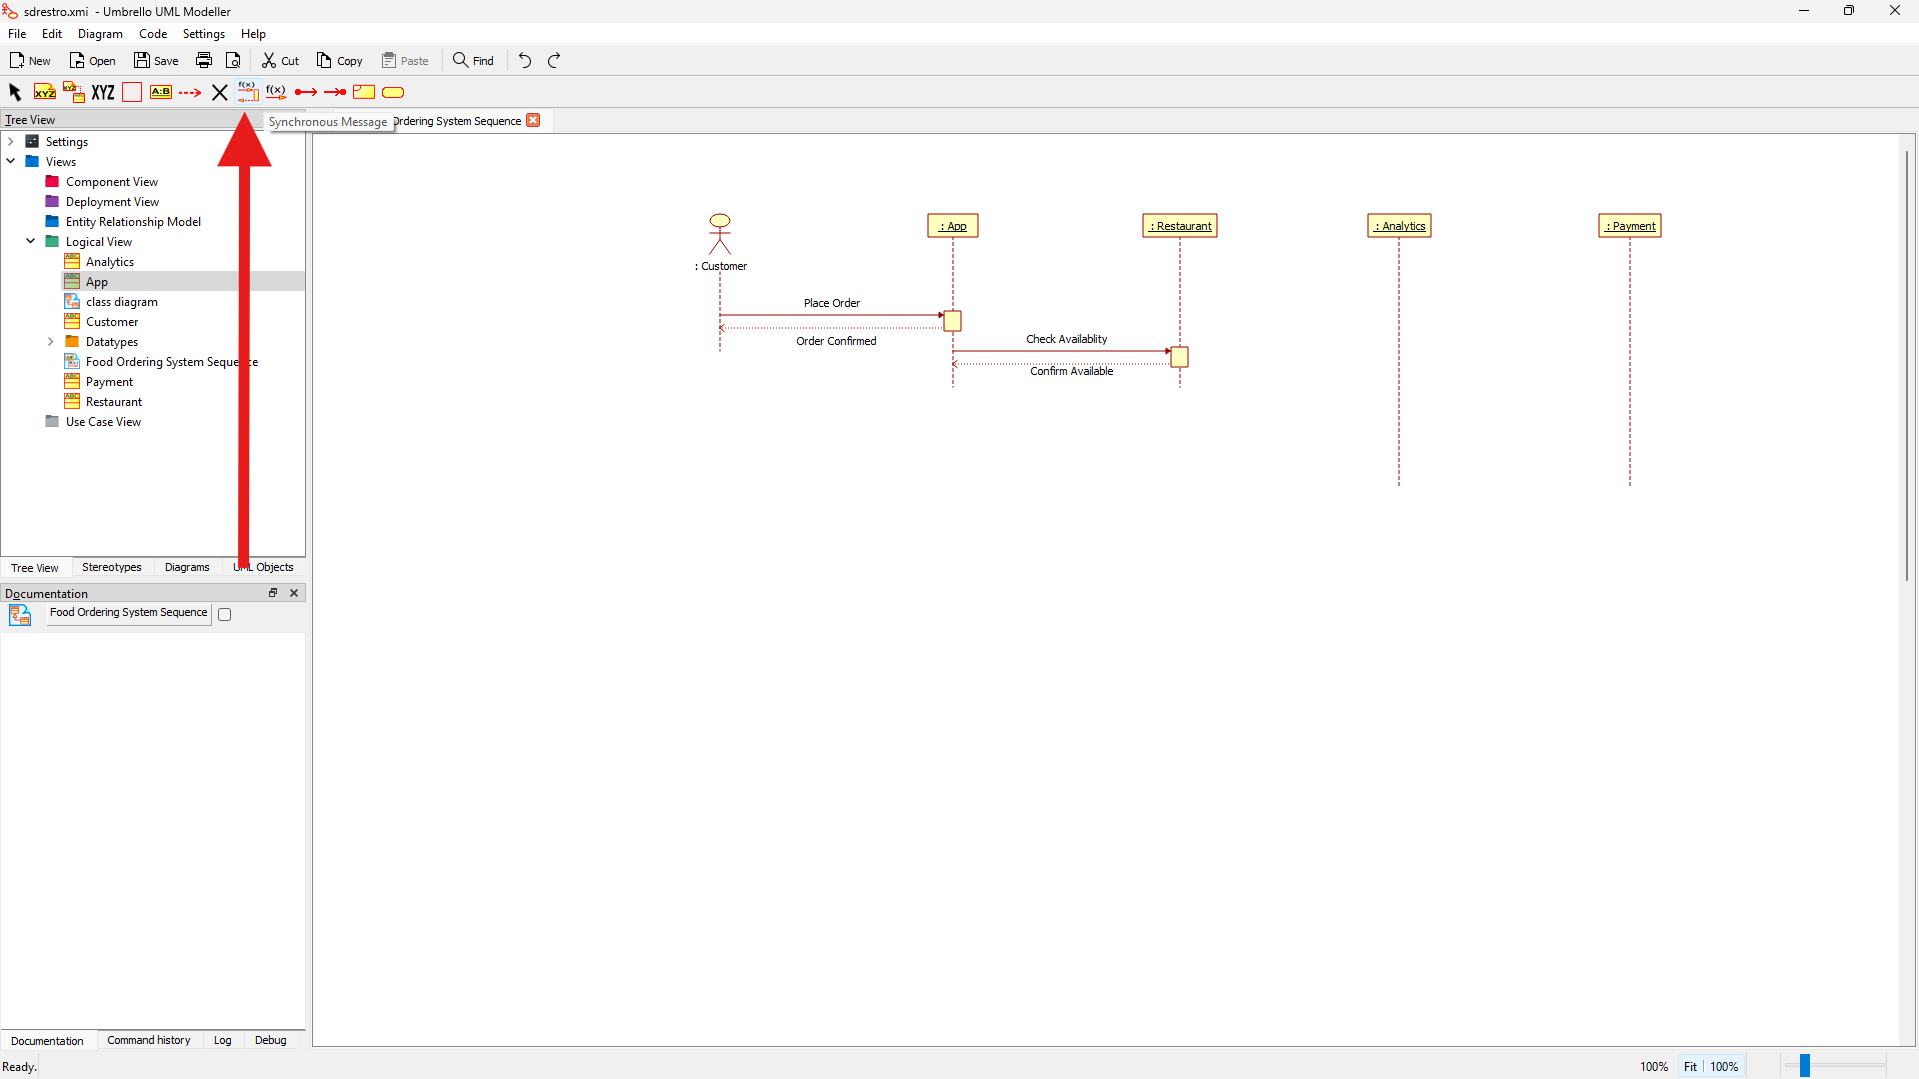
Adding More Synchronous Messages
- Add the following synchronous messages in sequence:
- From App to Restaurant: "Check Availability"
- From Restaurant to App: "Confirm Available"
- From App to Payment: "Process Payment"
- From Payment to App: "Payment Confirmed"
 Adding multiple synchronous messages
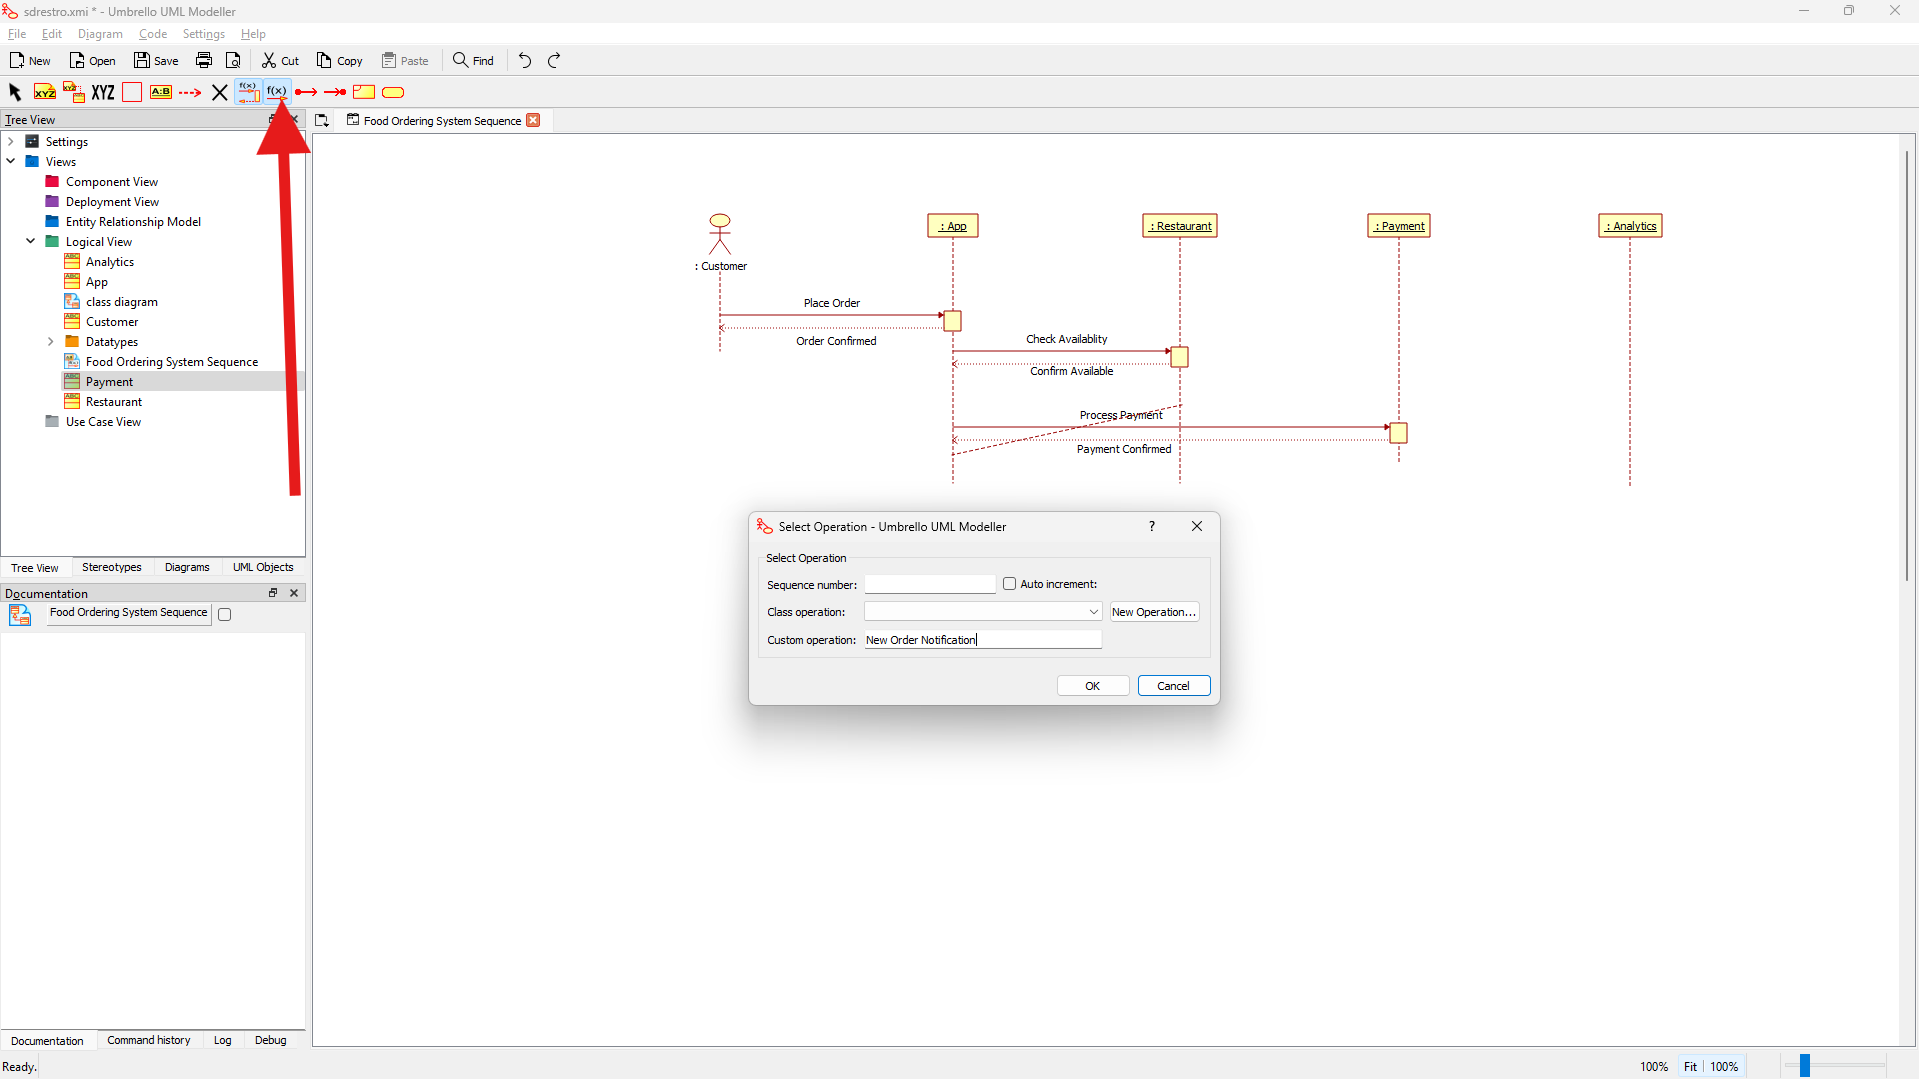
6. Adding Asynchronous Messages
Creating Asynchronous Messages
- In Umbrello, asynchronous messages don't require a return message
- Click on the Asynchronous Message tool in the toolbar
- Click and drag from App to Restaurant
- Enter "New Order Notification" as the custom operation
 Creating an asynchronous message
Adding Another Asynchronous Message
- Add another asynchronous message from App to Analytics
- Enter "Log Order Data" as the custom operation
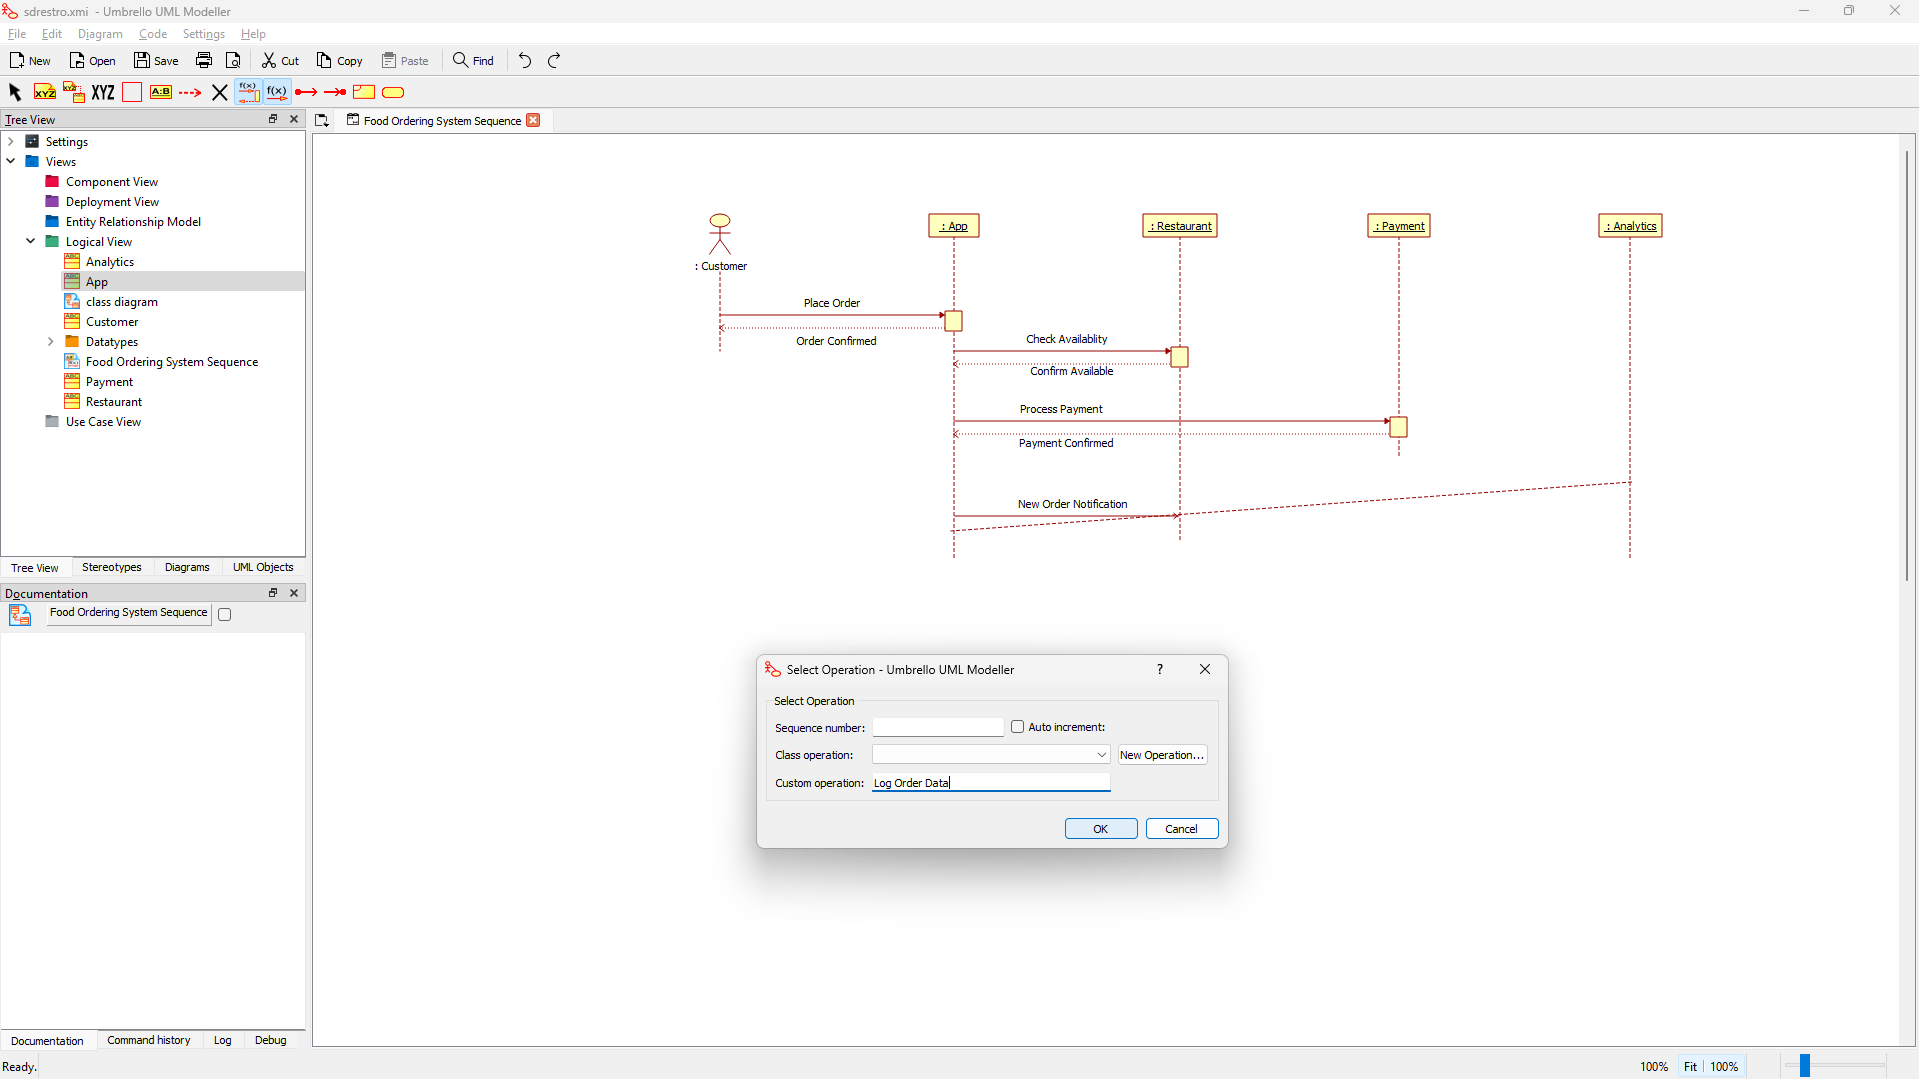 Adding a second asynchronous message
7. Working with Activation Boxes
Adjusting Activation Boxes
-
Activation boxes (yellow rectangles) are automatically created for synchronous messages
-
To adjust their size:
- Select the activation box
- Drag the bottom edge to resize it
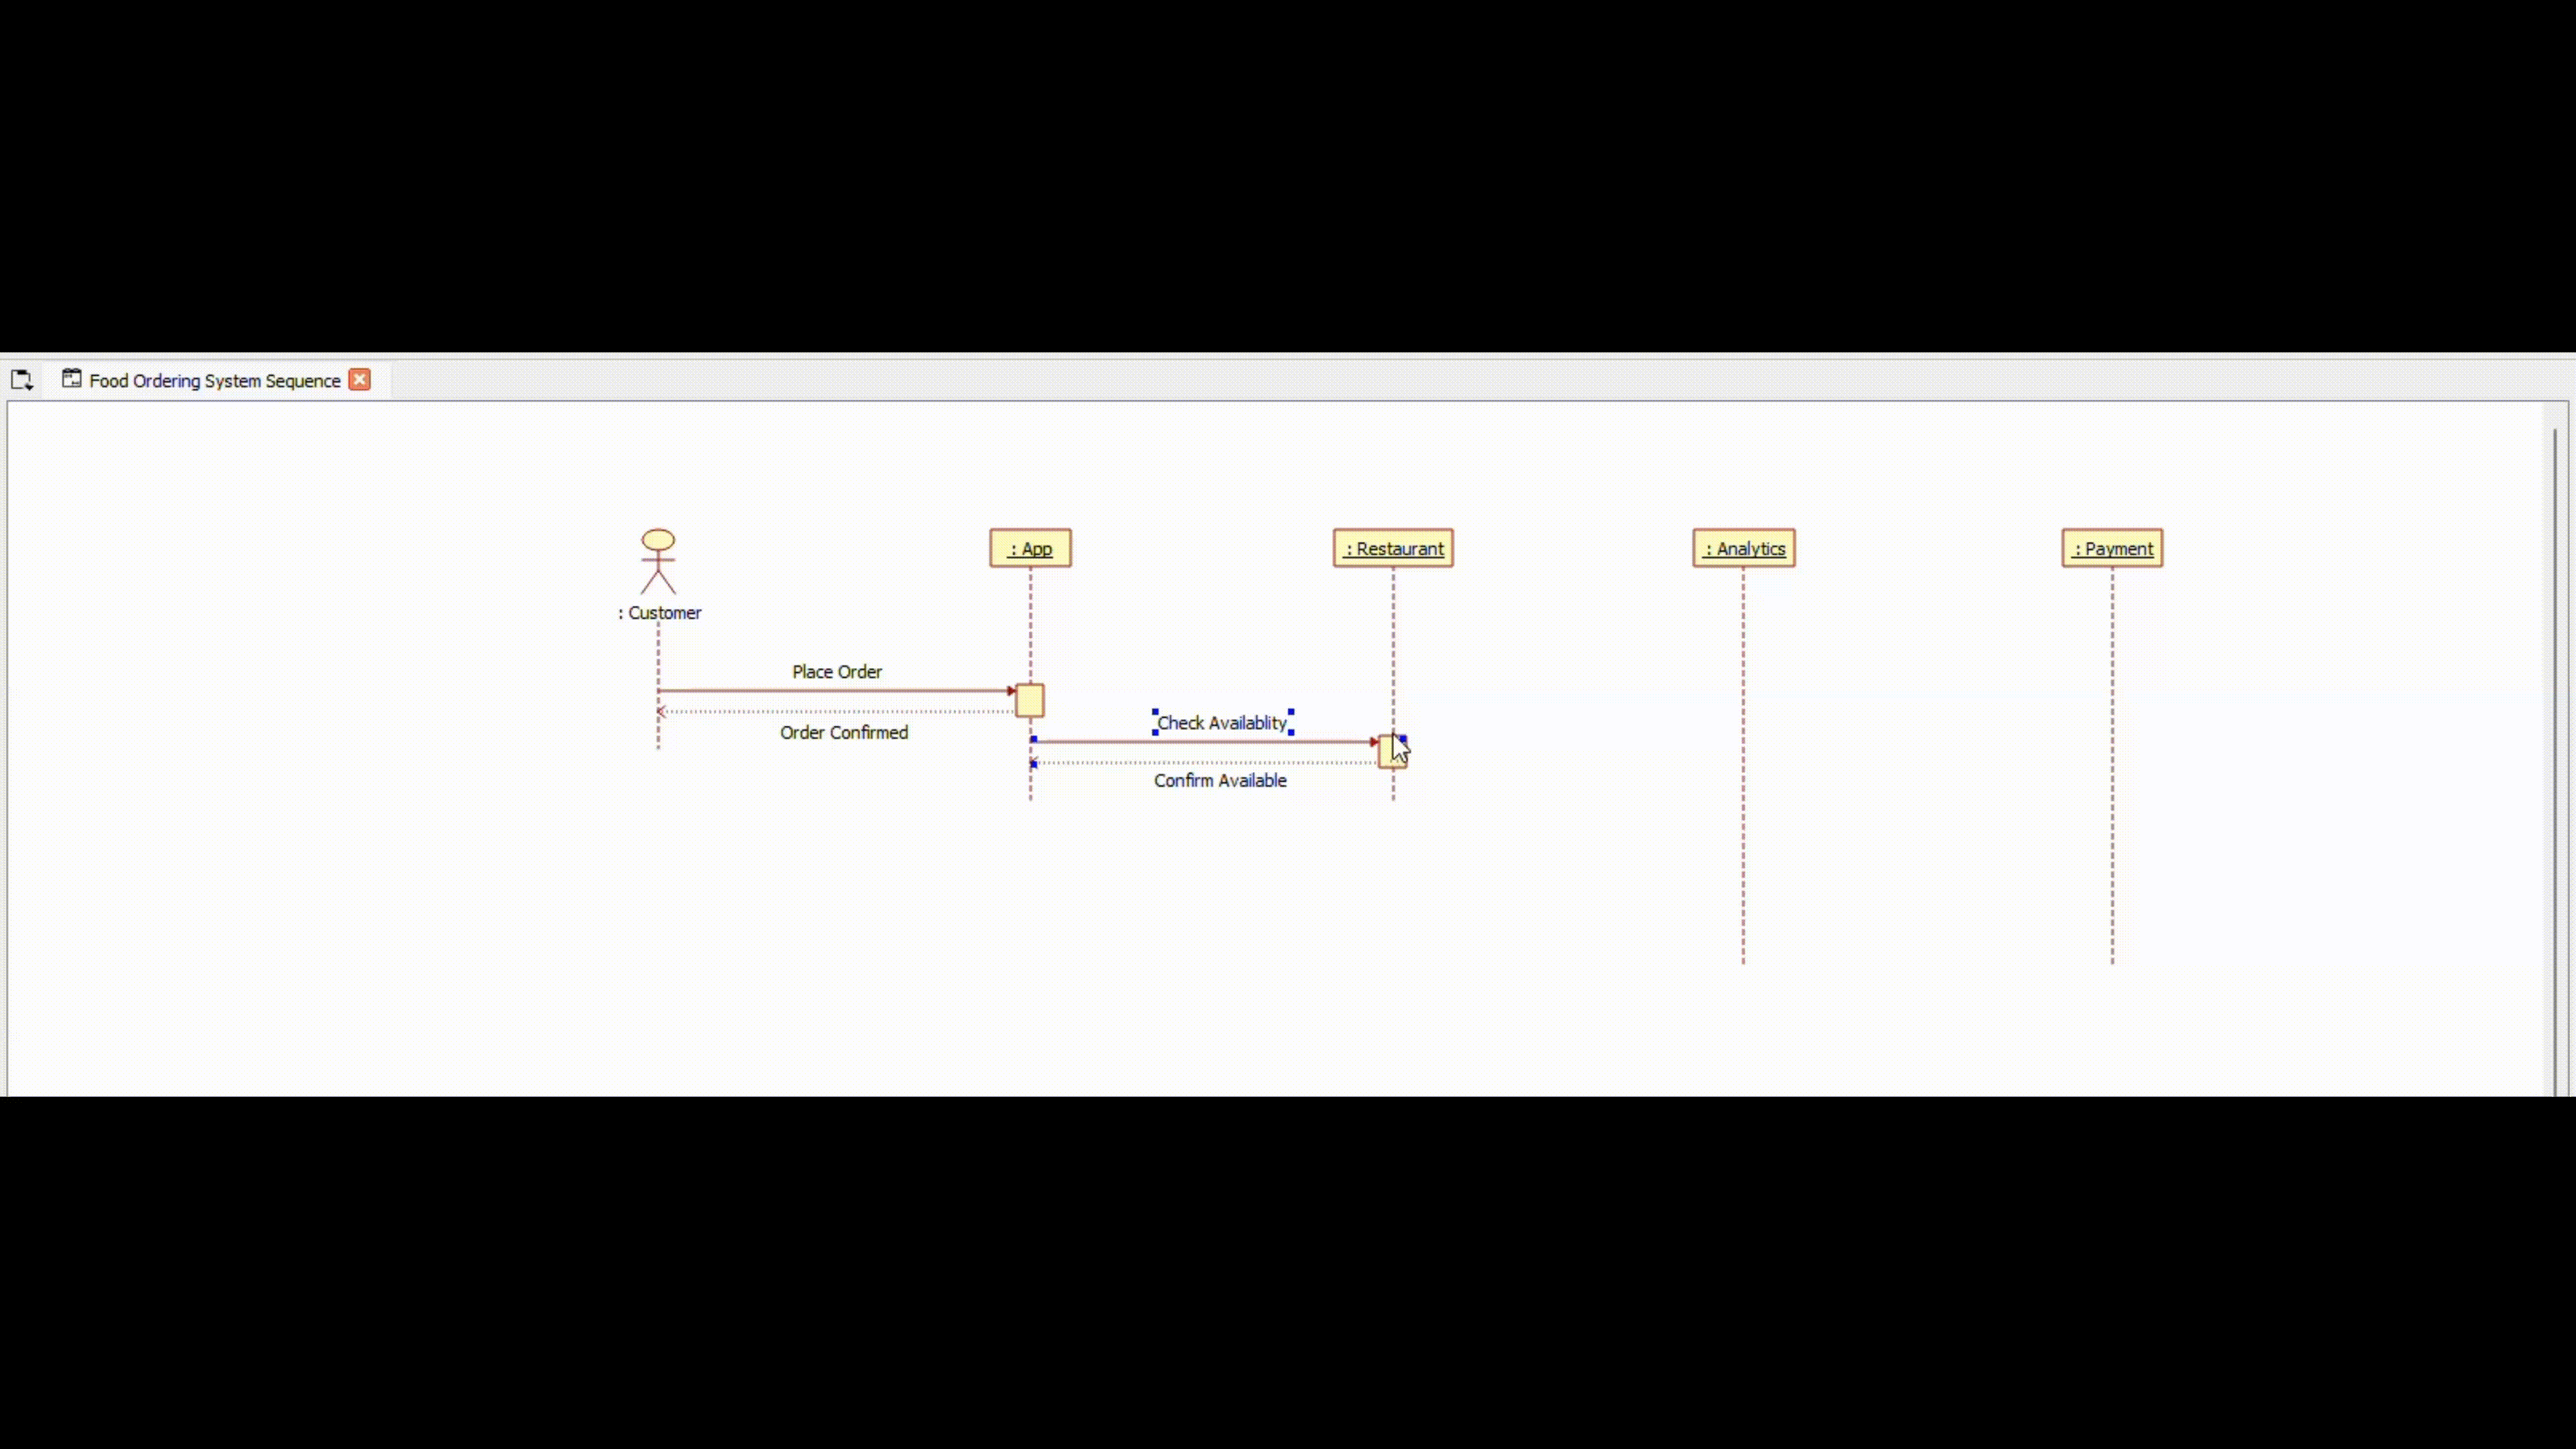 Adjusting the size and position of messages and activation boxes
 -
Position boxes to clearly show the sequence of operations:
- Place later messages below earlier ones
- Ensure proper spacing for readability
- Align related messages to show their relationships
8. Managing Destruction
Working with Destruction Markers
- In some cases, you may want to show object destruction
- To enable this option, right-click on an object and select Properties
- Check "Show destruction" to display an X at the end of the lifeline
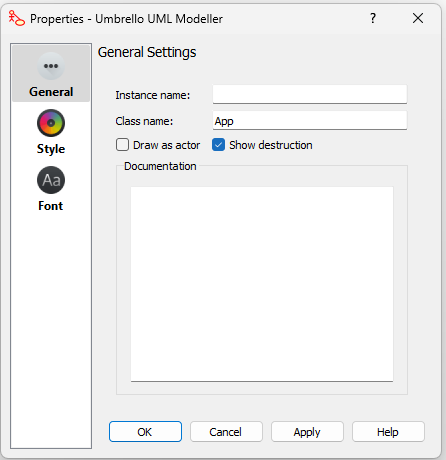 Enabling destruction display
Hiding Destruction Markers
-
If you don't need to show destruction, you can hide these markers
-
Right-click on the object and select "Hide destruction box"
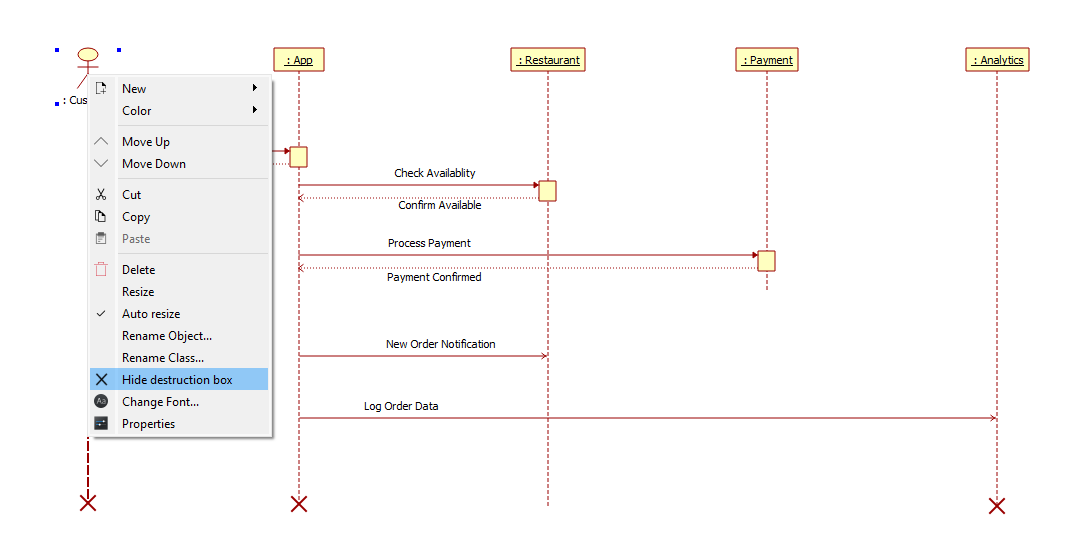 Hiding destruction markers
 -
This is useful when modeling services or components that continue to exist after the interaction
9. Saving and Exporting
Saving Your Work
- Go to File → Save As
- Choose a location and filename
- Select .xmi format
- Click Save
Exporting as an Image
- Go to Diagram → Export as Picture
- Select your preferred format (PNG, SVG, etc.)
- Choose location and save
10. Keyboard Shortcuts
- Ctrl+S: Save
- Ctrl+Z: Undo
- Ctrl+Y: Redo
- Delete: Remove selected element
Additional Tips for Working with Sequence Diagrams
Message Types
- Synchronous Messages: Show operations where the sender waits for a response
- Asynchronous Messages: Show operations where the sender continues without waiting
- Reply/Return Messages: Show the return of control (often with return values)
- Creation Messages: Show the creation of objects during the sequence
- Destruction Messages: Show when objects are destroyed
Best Practices
- Arrange lifelines from left to right based on their first interaction in the sequence
- Keep the diagram focused on a specific scenario or use case
- Use descriptive message names that indicate the action being performed
- Maintain proper time sequence (messages flow from top to bottom)
- Group related messages with proper spacing for clarity
- Add notes or comments for complex interactions